Thursday, December 21, 2006

Holiday cookies

Big cookie swap at work. I spent Sunday making eight dozen of these:

Holiday cookies

I'm calling them raspberry schmear cookies. Originally, I was planning to do a raspberry jam sandwich cookie for the swap. And then it dawned on me that I'd have to make SIXTEEN DOZEN cookies in order to have eight dozen finished sandwich cookies. I don't mind doing some work, but that was going to be ridiculous. So, I mixed up the dough from the original cookie recipe and tried to figure out how to incorporate the raspberry preserves. I could do a filled cookie, or spread the preserves over the rolled out dough to make a spiral cookie... and then I started thinking about one of my favorite desserts to make, which is Giada De Laurentiis's jam crostata. It's a basic butter pastry dough spread with jam or preserves. As it bakes, a lot of the water evaporates out of the preserves, leaving you with a thickened, almost caramelized filling. When I need a quick no-fuss dessert, that's what I make. I thought that maybe I could get a similar result on a cookie by spreading a thin layer of the preserves on the cookies before baking....

Worked like a charm. The consistency of the preserves changes completely after baking. You're left with a thin, slightly sticky fruit layer, very different from the messy preserves you start with. The cookies stick to each other a bit when piled on top of each other, but come apart easily. I think they look very festive (part of the reason I used red raspberry preserves... very Christmas-y).

And as it turned out, the original recipe makes half the number of cookies it claimed, so it was a VERY good thing that I had already decided to go another route. The recipe said it would make 2 dozen sandwich cookies... I rolled mine out THINNER than what they called for, and got 2 dozen cookies, which would have only made 1 dozen sandwiches.

Anyway... basic sugar cookie plus about 1/2 to 1 teaspoon of raspberry preserves spread thinly on top, baked at 325 degrees for 12-16 minutes.

Sunday, December 17, 2006

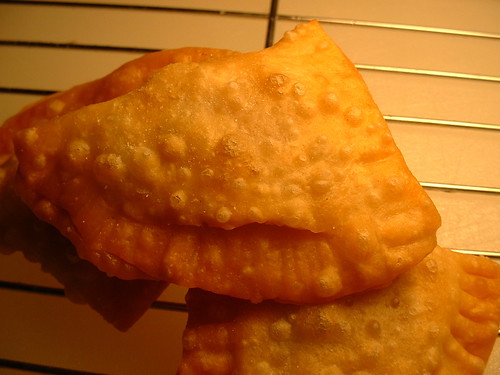
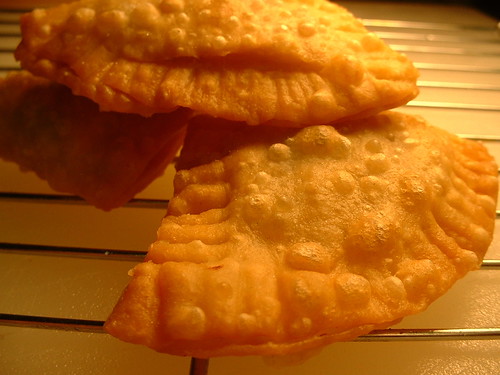
Samosas

Samosas

I went to a holiday party at a friend's house last night, a party that involved dinner. The main dish was curry chicken, and my contribution was a batch of homemade samosas, a yummy savory Indian pastry. Inspiration came from Curried Favors: Family Recipes from South India by Maya Kaimal MacMillan. This was one of the first cookbooks I checked out when I started working at the library, but somebody had placed a reserve on it and I had to return it before I got a chance to try any of the recipes... quite upsetting. The whole book makes me drool.

The recipe in the book is a bit labor-intensive -- not unreasonably so, but there's a good amount of work involved. To make things a little faster and easier, I got out my favorite kitchen appliance: my food processor. The version I made ended up being quite different from the one in the book. Not only did I make good use of the food processor instead of chopping and mixing things by hand, but I also had to make a quick substitution when I discovered that the onion I had on hand was older than I thought it was. The top of it looked fine... the bottom was scary. I needed something to take up the room that the onion would have filled. Out came a couple of carrots. Carrots and cumin work well together, so it was a good match for the filling.

Everything "shredded" was done with the shredding blade on the food processor. It takes 10 seconds to zip a couple of potatoes and carrots through. Without a food processor, you can absolutely chop everything up by hand. The dough can also be made by hand; after combining the ingredients, knead it for a minute or two until it is smooth.


Samosas
Makes 24 samosas, serves 8-12

2 cups all-purpose flour
1 teaspoon salt
1/3 cup vegetable oil
1/2 cup water

2 medium waxy potatoes, peeled, shredded OR diced into 1/4" cubes
Salt for boiling potatoes
1 teaspoon cumin seeds
2 tablespoons olive oil
2 medium carrots, peeled, shredded OR chopped finely
2 teaspoons grated ginger (freezing the ginger makes this a lot less messy)
1 teaspoon ground coriander
1/2 teaspoon garam masala
1/8 teaspoon cayenne pepper
1 teaspoon salt
1 cup frozen peas
Juice of half a lemon

Oil for deep frying (I used canola oil; vegetable oil or peanut oil are also good choices)


Combine the flour, salt, and oil in a food processor and pulse to mix thoroughly. Add the water a couple of tablespoons at a time, mixing after each addition, until the dough comes together and forms a ball. Turn the dough out on to a piece of plastic wrap, flatten into a rectangle (to make it easier to evenly divide it later), fold the plastic wrap over the dough to cover completely, and refrigerate the dough while you make the filling.

Place the potatoes in a saucepan filled with cold, well-salted water. Bring to a boil, reduce heat, and boil for 5 minutes or until tender. Drain well and set aside.

In a large skillet over high heat, toast the cumin seeds in oil until they are light brown and fragrant. Add carrots and ginger, and fry until the carrots begin to soften. Add the coriander, garam masala, cayenne, and salt, and stir to combine.

Stir in the peas and fry for 2 minutes. If you find that the spices are sticking to the bottom of the pan, stir in a couple of tablespoons of water. Stir in the cooked potatoes and fry for 2 minutes, stirring to combine. Stir in the lemon juice and remove from the heat. Allow the mixture to cool before moving to the next step.

Remove the dough from the refrigerator and divide into 12 equal pieces. Working with 1 piece of dough at a time, knead the dough for a minute in your hands, then roll into a ball. Place the ball between 2 pieces of plastic wrap, flatten with your hand, and roll out to a very thin 6" round. Cut the round in half; you'll now have two half-circles. Take one half-circle of dough, place a tablespoon of filling off to one side, then fold the other side of the dough over to cover the filling. Use a little bit of water to seal the open edges. Press the seals closed with a fork. If they're not completely sealed, they'll leak when fried. Repeat with the other half-circle of dough. Repeat the process for the other 11 pieces of dough.

In a heavy saucepan or deep fryer, heat oil to 375 degrees F (to prevent boilovers, the oil should only come about halfway up the sides of the pot). Fry the samosas in small batches; the size of your batches will depend on the size of your pot. Keep the oil temperature are 350-375 degrees while frying. Remove the samosas from the oil when they are light golden brown, and place on a paper-towel lined plate to drain (or use an Alton Brown draining rig: an upside-down cooling rack placed on top of a paper towel-lined baking sheet).

Samosas

Wednesday, November 29, 2006

Ropa Vieja

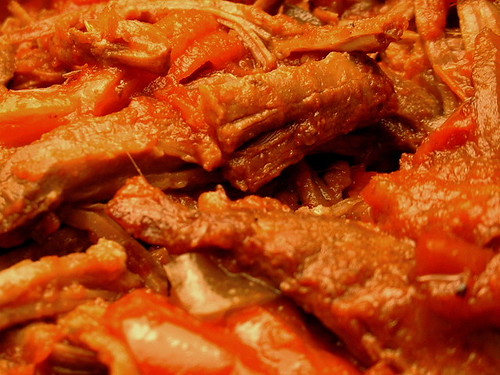
I've tried a couple of different recipes for ropa vieja over the last couple of years. It's a Cuban flank steak, braised until the meat is falling apart, with bell peppers, onions, tomatoes, and spices. The name comes from a poetic way of looking at the finished dish; the shredded beef and veggies DO look a bit like the tattered ends of a piece of old cloth (those of us who remember our high school Spanish might remember that ropa vieja means "old clothes").

Sara Moulton has a pretty good recipe for it in Sara's Secrets for Weeknight Meals. It's a "quicker" version, taking 3 hours from start to finish (and for this dish, yes, 3 hours is quick). Theoretically, you could get home at 5:30, start cooking, and have a late dinner around 8:30. My only complaint is that Sara Moulton's recipe calls for olives and some of the olive jar liquid, and all I could taste in the finished dish was OLIVE (and I LIKE olives, folks). Cut back on the olive flavor... it's a winner. Her recipe does a really nice job of making this time-consuming dish into something that someone COULD make during the week after work.

On the other hand, there's Daniel Boulud's recipe in Braise, which I made on Monday night/Tuesday morning. This cookbook is exactly what the title suggests: nothing but slow-cooked, braised dishes. His ropa vieja recipe calls for the meat to marinate overnight in a garlic and oregano rub, and then cook for 4 hours the next day. I ended up futzing with the schedule for it a bit. The meat marinated while I was at work Monday, and instead of cooking it for 4 hours in a 275-degree oven, I cooked it overnight in a 200-degree oven (which, yes, meant that I was getting up every couple of hours to flip the meat and make sure I hadn't accidentally lit the kitchen on fire). The meat fell apart as soon as I touched it Tuesday morning, and the sauce flavor is deep and rich. It's filling and satisfying without being heavy. I had white rice with mine, mixing the shredded beef and vegetables in with the rice.

ropa vieja

Ropa Vieja (the extra-long version)
serves 4

3 garlic cloves, chopped
1 teaspoon dried oregano
1 teaspoon kosher salt
1 lb flank steak
1-2 tablespoons extra-virgin olive oil
1 medium onion, thinly sliced
1 green bell pepper, cored, seeded, and thinly sliced
1 red bell pepper, cored, seeded, and thinly sliced
1/2 cup sherry
1 14.5 oz can crushed tomatoes (low sodium or no salt added, if possible)
2 bay leaves
Fresh ground black pepper

Combine the garlic, oregano, and salt. Place the meat in a nonreactive container and rub on both sides with the garlic mixture. Cover with plastic wrap and refrigerate for 6 hours to overnight.

Place a rack in the center of the oven and preheat to 200 degrees F.

Heat 1 tablespoon of olive oil in a large ovensafe pot or Dutch oven over high heat. Scrape the rub off the meat and reserve. Sear the meat on both sides until browned, 5-7 minutes. Transfer the meat to a plate and set aside.

Add another tablespoon of oil to the pot if needed. Add the onions to the pot and cook until light brown, 8-10 minutes. Add the bell peppers and cook for 5 minutes. Add the sherry (away from the heat!), bring to a simmer, and scrape any browned bits from the bottom of the pot. Add the tomatoes, 1 cup of water, the reserved rub, and the cayenne pepper. Return the meat to the pot, nestling it in with the vegetables. Add the bay leaves and salt and pepper to taste. Bring to a simmer.

Cover the pot and transfer it to the oven. Cook until the meat is tender, 6-8 hours, turning the meat every 1.5-2 hours. (If the liquid level gets too low, add more water; the sauce should be thick, but not a paste.)

Remove the bay leaves from the pot, shred the meat, and serve.

Sunday, November 26, 2006

Sacaduros

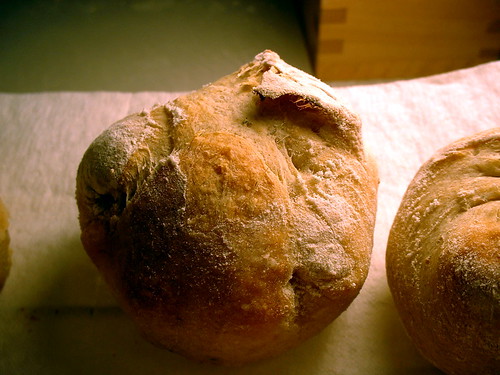
The sacaduros were a bit of a process, but well worth the effort. Would I make them for a huge party? No. But for Thanksgiving dinner for 5 of us, making a dozen rolls wasn't a problem.

The recipe comes from The Bread Bible by Rose Levy Beranbaum. It calls for a batch of the Basic Hearth Bread dough from the same book. The Hearth Bread has become my standard crusty bread recipe, so even though this was a new recipe, I was familiar with the basic dough.

Once the dough is made, you tear off pieces that are about 2 tablespoons (or, if you're me, "that-looks-roll-sized" pieces... very precise). Roll them into a ball, then flatten into a disc. You then fold the dough around a cube of butter, making a sealed package. The recipe calls for 1/2" cubes, but I thought that would be overkill, so I used a 1/2" cube for every 2 rolls, cutting the butter in half. Knowing my family, I figured that even if I told them repeatedly that the rolls had butter in them, they'd still add more butter (which is exactly what happened).

Once the roll is shaped, you place it sealed-end down into a bed of flour, and continue shaping the remaining rolls. The recipe and I differed hugely on the next point. According to the recipe, you're NOT supposed to brush the excess flour off of the rolls before baking. However, my rolls were absolutely covered in flour, so much so that they resembled powdered sugar doughnuts. I brushed most of the excess off, leaving just a dusting of flour on the tops.

Sacaduros

They came out great. Nice chewy crust, and very moist inside thanks to the butter.

And every time I page through this book, I'm reminded of exactly how many things I still have to try out...

Wednesday, November 22, 2006

My Thanksgiving baking schedule

For the last couple of years, my Thanksgiving food responsibilities have been the baked goods: bread and dessert. I have a 3-hour drive up to my parents' house, so I need to bring something that's easily portable and won't suffer too much from a ride in the car. Also, I'm the baker in the family, and not to puff myself up too much, but if I didn't make fresh baked goods, we wouldn't have them. Thanksgiving dessert when I was growing up was usually an Entenmann's or Pepperidge Farm cake with Ready-Wip (not that there's anything wrong with that). Now, dessert is something that I've made from scratch... with Ready-Wip. Some things are TRADITION, people.

For the bread, I decided to make sacaduros, rolls that have a cube of butter enclosed in the middle. You pretty much cover them in flour before baking, and the sealed ends come apart a bit during baking. The recipe comes from Rose Levy Beranbaum's Bread Bible, and uses her Basic Hearth Bread as a base. The Basic Hearth Bread is my standard "crusty bread" recipe, so I'm already familiar with the dough. The new part for me is the shaping and folding of the dough to create little packages around the butter.

The dessert is a gingerbread-cider cake, which has never gotten anything less than raves the other times I've made it. Yesterday at work, everyone was talking about their plans and the dishes they were making for Thanksgiving... everyone that heard about this cake said that it sounds very much like something I need to bring in. (They're very fond of cake). The cake part is a standard gingerbread, and as it bakes, it makes a caramel sauce on the bottom of the pan. The recipe was the winner of the Boston Herald's holiday baking contest a couple of years ago, and came to me via the Best American Recipes 2003-2004. I can't say enough about the Best American Recipes series of cookbooks. There's a new one each year, and the editors go through countless sources to find a cross-section of the year's best recipes. They test each and every dish that's in the book, and there truly is a bit of everything (hearty family meals next to elegant gourmet offerings). I haven't had a recipe from this series come out badly; I'm eagerly awaiting the 2006-2007 edition, probably out early next year.

So, I thought, for fun, I'd share my baking schedule. I didn't want to make anything really far in advance and freeze it, so I decided to do all my work Tuesday night and Wednesday morning before leaving for my parents' house.

Tuesday, 12:30 pm - 9 pm: Work

9:30 pm : Go to Giant for more bread flour and other baking necessities. Grumble at Giant for only having whole cloves, not ground cloves. Decide that the cake will be acceptable without cloves (there's only 1/4 tsp to begin with, and plenty of other flavorings going on).

10:00 pm: Get home, check e-mail.

10:30 pm: Pour self glass of sherry. Assemble sponge for sacaduros.

12:30 am: Mix bread dough and knead it. Let dough rest for 20 minutes, then knead more until it's the correct texture.

1:00 am: Put dough in refrigerator to rise overnight. Go to bed.

Wednesday, 8:00 am: Get dough out of the refrigerator. Discover that it's nowhere near doubled in volume because it only had 7 hours in the fridge, not 12 like I normally give it. Give it time to come up to room temperature, and let it finish rising.

9:30 am: Once bread dough has finished rising. Make cake batter.

9:45 am: Put cake in the oven. Shape rolls while the cake bakes.

10:45 am: Pull finished cake out of the oven. Crank up oven heat for rolls, set cake aside to cool.

11:00 am: Put rolls in the oven.

11:20 am: Take finished rolls out of the oven, set aside to cool.

12:00 noon: Leave for parents' house.

I'll try to get pictures up later in the week, but for now: Happy Thanksgiving!

Thursday, November 09, 2006

Posole-Inspired Chicken and Rice Soup

I'm a big fan of posole, a Mexican soup using hominy. Of course, I rarely have hominy on hand, and I wanted something with those flavors that could be made with ingredients that I usually have on hand. Thus, this recipe.

To make this with hominy, leave out the rice, and add two drained 15-oz cans of white hominy.

Posole-Inspired Chicken and Rice Soup
serves 4

1 tablespoon olive oil
1 medium onion, chopped
4 cloves of garlic, minced
2 tablespoons tomato paste
1/2 teaspoon ground cumin
1/4 teaspoon cayenne pepper (optional)
1/2 teaspoon dried oregano
2 cups chicken broth
2 cups water
1 cup uncooked rice
3 cups shredded or cubed cooked chicken (about 1 pound)
1/2 cup frozen corn kernels
1/2 cup frozen peas
Salt and pepper to taste

1. Heat the olive oil in a large saucepan or stockpot over medium heat. Add the chopped onions and cook until translucent, 3 to 5 minutes. Add the garlic, tomato paste, cumin, cayenne, and oregano. Cook, stirring, until the ingredients are evenly distributed.

2. Add broth, water, and rice. Bring to a boil, reduce heat, and cook, stirring occasionally, until the rice is tender, 18 to 20 minutes. If you would like the soup to be thinner, add additional broth or water.

3. Stir in the chicken, corn, and peas. Cook until the chicken and vegetables are heated through. Add salt and pepper to taste, and serve. For something more like an "authentic" posole, also serve diced avocado, chopped lettuce, sliced radishes, tortilla strips, cilantro, grated cheese, and/or onions on the side so everyone can garnish their bowls.

Saturday, October 21, 2006

Panko and Ginger Crusted Chicken

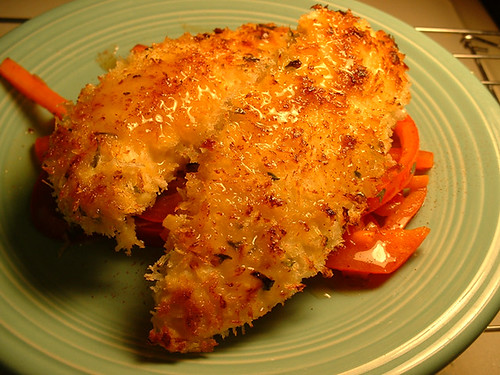
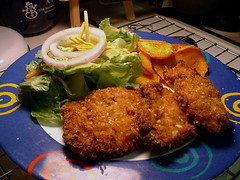
I had some fun with last night's dinner... a slight adaptation of the Panko-and-Ginger-Crusted Chicken with Stir-Fried Vegetables and Sweet and Sour Mustard Sauce from Charlie Trotter Cooks at Home. It's a really nice book, but I wish there were pictures of the dishes. The only pictures to be found are x-rays or photo paper impressions of various food items; they look neat but don't help the reader to envision the finished dishes. However, even without pictures, you get a good idea of what you'll end up with, since all of the recipes have descriptive titles that list most of the ingredients. The recipes have unexpected flavors or presentations, and are a nice change of pace for a home cook who might be looking to spice things up a bit (although not all of the recipes are as easy or quick as the one I chose).

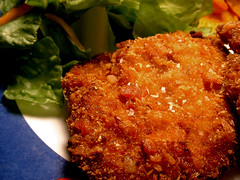
For this dish, strips of chicken breast are coated with a mixture of panko breadcrumbs and minced ginger (1 tablespoon of ginger for each cup of panko) and fried in just a couple of tablespoons of oil. The ginger flavor is fairly strong, but not in a bad way. To balance the ginger, there's a honey-mustard sauce that's 2 parts honey to 1 part mustard, with a bit of rice wine vinegar added to cut the sweetness. The sauce recipe calls for Chinese mustard, but the local Giant didn't have any, so I used Dijon mustard. Since I had it in my head that Chinese mustard is hot, I added just enough cayenne pepper to give it a little kick. Not exactly the same as the recipe version, but I still ended up with a nice, tangy, sweet sauce.

The recipe calls for a veggie combo that I'm not crazy about (bok choy/leeks/water chestnuts/bean sprouts), so I stir-fried some bell peppers, carrots, and shallots instead. Broccoli would have been a nice addition, as would green beans or snap peas.

Definitely not a dish for anyone who doesn't like ginger or mustard or honey. Those are the three dominant flavors, and although they match well with each other, none of them is subtle.

I'm looking forward to trying some more recipes from this book, especially some of the desserts.

Panko and Ginger Crusted Chicken

Tuesday, October 17, 2006

Naan

Naan

Last night on my other blog, I pondered about whether or not a home cook without a tandoor oven would be able to make decent naan. Naan is an Indian flatbread, and it's traditionally baked in a special oven called a tandoor oven, something that's used a lot in Indian cooking. I don't have anything even close to a tandoor oven here, and if I did, I'd probably find a way to burn down my apartment building. The things burn HOT.

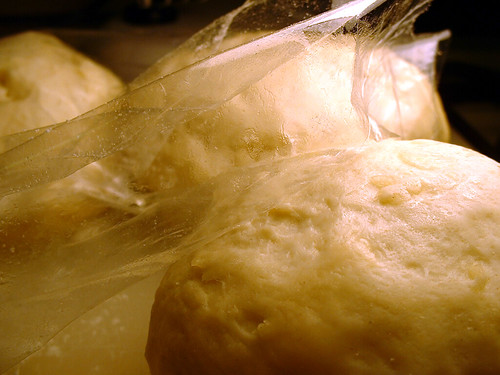
I turned to Nick Malgieri's A Baker's Tour, which is a book entirely about international baking. I figured, if I was going to find a decent naan recipe, it would be in this book. It's full of savory breads and pastries, sweet cakes and cookies, all adapted so that the average home cook can make them. As luck would have it, there's a recipe for naan in this book that requires either a skillet or a grill. It's a pretty standard bread dough: 4 cups of flour, 2 tsp salt, 1 tbsp sugar, 1 packet of active dry yeast (2.5 tsp), 1.25 cups warm water, and 1.5 tbsp vegetable oil. My only real complaint about this book is that the recipes assume that everyone will be making their dough in a Kitchenaid stand mixer with a dough hook. I don't have a stand mixer, so I guessed at how long to knead by hand. Flatbreads can't have too much elasticity or it's too hard to flatten and stretch out the dough. For less elasticity, you knead less. In this case, I only kneaded for about 2 or 3 minutes. The dough rises for an hour, then gets shaped into balls and rises for another hour:

naan dough rising

Once the dough has risen, you heat up a skillet, covered. The skillet needs to be as hot as possible in order to properly cook the naan. One at a time, the balls of dough are flattened, stretched into 8" rounds, and then cooked in the skillet, covered, for about 2 minutes on each side. To finish, you brush them with melted butter and serve.

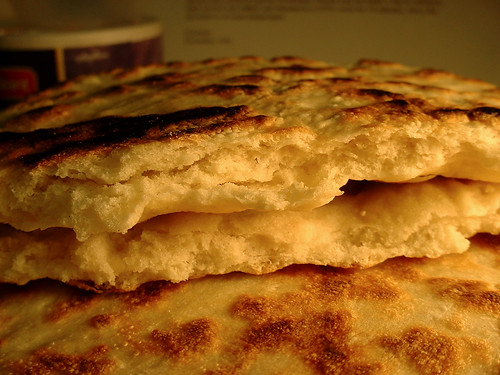
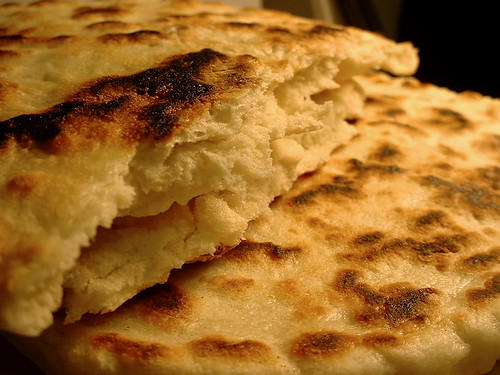
They turned out great; not exactly like the naan I've had at Indian restaurants, but close enough to make me happy. The texture was soft and tender, with just a few crispier spots on the outside where the dough had charred. Next time, I'm going to try to get them thinner, and I may also add some garlic to the dough. Garlic makes everything better, right?

naan

Technorati tags: , , ,

Monday, October 09, 2006

Shepherd's Pie

A few years ago, I was watching Martha Stewart Living, and Australian chef Donna Hay was doing a guest spot. She made a pasta dish with arugula and asparagus (I think), and I remember being impressed by how clean and simple the recipe was. Every recipe of hers that I've seen has been the same way: basic, easy, healthy food. When a copy of her Modern Classics (Book 1) came across the desk at the library, I decided to bring it home so I could finally TRY some of her recipes.

Tonight, I had a go at Donna Hay's shepherd's pie recipe. I've made shepherd's pie before, mostly from various Rachael Ray recipes, but the 30 minute ones don't have much "depth of flavor". Rachael Ray absolutely insists that all you have to do to make something taste slow-cooked is add canned broth... and I haven't found that to be the case at all. RR's basic shepherd's pie recipe gets just about all of its flavor from a cup of beef stock and a bit of Worcestershire sauce, and those flavors don't get any chance to incorporate or develop. The "gravy" isn't cooked with the filling, so it doesn't pick up any flavor from the meat or vegetables. The liquid literally only cooks for one minute before being stirred into the filling, and then everything goes together and under the broiler for 5 minutes. The flavor gets no chance to mellow out or deepen, and the finished filling tastes like... you guessed it, canned beef broth and Worcestershire sauce. Don't get me wrong: I've had RR's shepherd's pie many times, and I usually go back for seconds. However, I know full well that it doesn't taste much like the "real thing", and that there's nothing particularly subtle or special about the flavors.

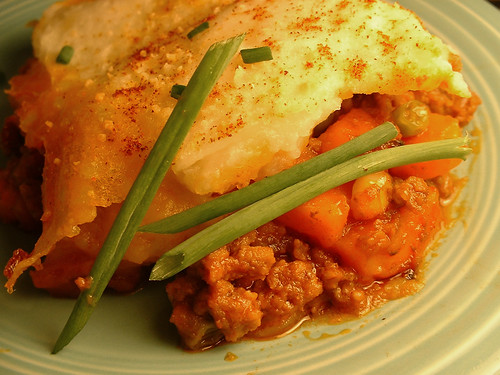
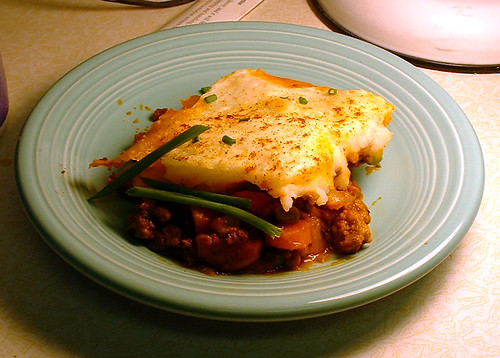
Donna Hay's recipe cooks longer and slower, and the flavors definitely get a chance to develop. The filling starts out with onions, carrots, and ground beef or lamb (I used ground beef, so technically what I have is cottage pie, not shepherd's pie). Once those have sautéed together and the meat is browned, you add tomato paste, tomatoes, beef stock, fresh thyme, and a bay leaf. This simmers for 15 minutes, then a cup of frozen peas is added, and it simmers for another 15 minutes. During this time, the liquid reduces down to almost nothing, and you're left with a thick filling that has a rich beef-tomato flavor. The assembled pie then bakes for 30 minutes. The mashed potatoes have butter, milk, and parmesan cheese, and are VERY flavorful as a result (and it's easy enough to scale back these ingredients if you're watching your sodium, fat, or cholesterol). Baking for 30 minutes browns the potatoes nicely, and gives them time to soak up some of the liquid from the filling.

Shepherd's Pie

I made a few changes to the recipe:

First, the recipe as written calls for a 14 oz. can of whole peeled tomatoes, but I don't really like having big chunks of tomatoes in sauces and fillings like this. I looked for a 14 oz. can of crushed tomatoes to use instead, but the smallest size I could find was 28 oz. I improvised a bit, and used an 8 oz. can of no-salt-added tomato sauce, figuring that this would give me the needed liquid without the tomato chunks.

Also, instead of adding a cup of frozen peas, I added about 3/4 cup frozen peas and 3/4 cup of frozen corn... I wanted to add extra veggies to take up some of the volume that I'd be missing by not using the whole tomatoes. A year ago, it would have been entirely frozen corn, but I seem to be getting beyond my dislike of peas.

The recipe calls for you to stir 1/2 cup of grated parmesan cheese into the mashed potatoes. I have a tendency to almost subconsciously cut back on sodium when I can, so I sprinkled a couple of tablespoons of parmesan over the top of the potatoes just before baking. I still got plenty of parmesan flavor that way, but with much less sodium. And I sprinkled some paprika and fresh chives over the top as well... yay for garnishing. :)

Shepherd's Pie

Something I'd serve at a fancy dinner party with important company? No. Absolutely perfect comfort food? You bet.

Technorati tags: , , , ,

Saturday, October 07, 2006

Sour Cream-Blueberry Crumb Cake

Since it's just me here, I tend not to make cakes or other big desserts for myself. I feel silly making a big cake that I don't even eat 1/4 of before it starts going stale. However, every once in a while, I get an urge to bake something sweet, like this evening after Battlestar Galactica. My main restriction: I only had one egg on hand.

As a member of one of those mail-order book clubs for cookbooks, I got an unexpected copy of The Cake Book by Tish Boyle last month after forgetting to decline it as a featured selection. I decided to keep it, since I have plenty of bread-baking books, but no cake-baking ones.

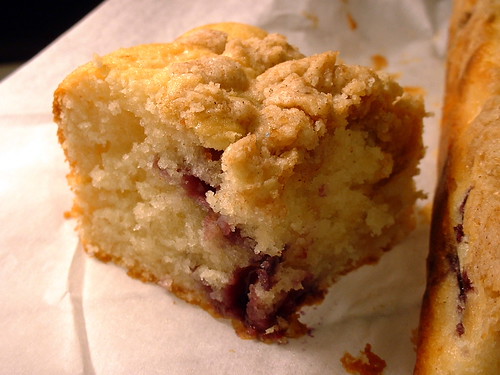
So, I opened it up this evening, hoping to find a low-on-eggs recipe. The one I settled on was a Sour Cream-Blueberry Crumb Cake, which called for two eggs. However, since it calls for a 9"x9" square pan, I theorized that maybe I could halve the recipe and bake it in a 9"x5" loaf pan. I'd be able to make do with the one egg I had, and end up with a nice half-size cake better suited to just me. The results?

Sour Cream-Blueberry Crumb Cake

A moist, tender cake, with a slight tanginess from the sour cream, punctuated with fruity bursts of flavor from the blueberries. The crumb topping is crunchy and buttery... in short, I'm very happy with it.

Since this recipe was straight out of a book with no variations from me, I don't think I can legitimately post it. However, I can pass along the tip of the day: if you have a recipe for a cake for a 9"x9" pan, you should be able to halve it and bake it in a 9"x5" pan with no ill effects (although I wouldn't try it with a yeast-based cake). It's a nice size for a small gathering of 2 or 4 people.

There are many other cake recipes in this book that I would love to try out, either just on myself or on unsuspecting coworkers (the Library of Congress has the full recipe list available here). The recipes here aren't exactly low-maintenance, but if they come out as well as this one did, I'm willing to put in a little extra work.

Technorati tags: , , ,

Wednesday, October 04, 2006

Green Jalapeno Sambal

I nabbed a copy of Simply Ming by Ming Tsai from the library, and I'm loving just reading through it. It's organized differently than most cookbooks I've seen. Instead of a chapter of appetizers, a chapter of soups, etc, Ming gives 32 master recipes for different sauces, rubs, salsas, and oils, and then gives about 3 recipes using each master recipe as an ingredient. For example, there's a master recipe for Roasted Pepper-Lemongrass Sambal, and then that sambal is used in a Grilled Portobello Sandwich, Braised Chicken with Mushrooms, and Orzo with Sausage. I love the way it's organized, since you can pick out recipes based on flavors. If you want something fiery hot, you can pick one of the Traditional Spicy Sambal recipes; for something with lots of herb flavor, there are recipes using a Five-Herb Vinaigrette. The master recipes are great ways to make weeknight meals, because they are all designed to be storable. You can easily keep a master sauce or spice rub on hand and add it to a quick meal at the last minute.

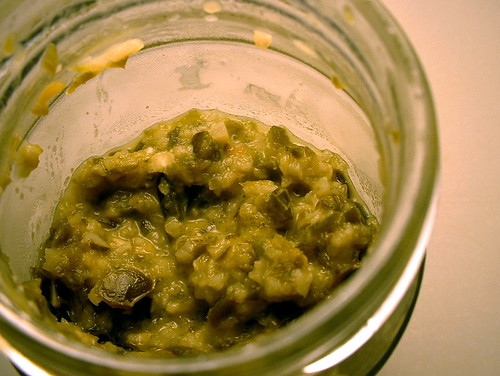
I was inspired to give the Traditional Spicy Sambal a whirl, since the given recipe has a pretty lethal amount of jalapeño peppers and Thai chiles. I'm not a chilehead, but reasonably spicy food makes me happy. I planned to use the sambal in Ming's Crazy Chicken-Rice Noodle Stir-Fry. However, my local supermarket didn't have any red jalapeños, and also didn't have Thai chiles. Recipe adaptation time! They did have green jalapeños, so I grabbed a half-pound of those. I decided to just leave out the Thai chiles (since, quite honestly, it's plenty hot as is).

I have dealt with jalapeño peppers before, and have never needed to wear gloves. Of course, that was with one pepper, maybe two. Apparently, chopping up a half-pound of the things is not quite the same. As I started peeling the garlic, I noticed a slight tingling in the fingertips on my pepper-holding hand. Within a couple of minutes, this had progressed to unbelievable burning pain. This kicked off a desperate search to find something to neutralize the capsaicin and pepper oils... taking a double dose of both allergy medicine and Aleve and soaking my fingers in cold milk has just about gotten rid of the pain. So, even if you don't have a reaction when cutting up one or two jalapeños, WEAR RUBBER GLOVES if you're going to be working with a large volume of them. I have a pretty high tolerance for pain, and trust me, you don't want to learn this one the hard way.

If there's an easy way to peel an entire head of garlic, I don't know what it is. I smashed the cloves with the flat side of a knife, removed the peels, and then used my food processor to mince the cloves.

Green sambal


Green Jalapeño Sambal
makes about 1/2 cup

1/2 pound green jalapeño peppers, stems removed, and roughly chopped
1 head garlic, minced
2 tablespoons vegetable oil
1/2 cup rice wine vinegar
1/4 teaspoon sugar
1/2 teaspoon salt

In a medium saucepan over low heat, cook the jalapeños and garlic in the vegetable oil, stirring occasionally, until softened, about 15 minutes. Add the rice wine vinegar and continue cooking until the liquid has reduced by half, about 15 minutes.

Remove the pan from the heat and stir in the sugar and salt. Allow to cool to room temperature. Transfer the mixture to a food processor and pulse to desired consistency. The sambal will keep in a tightly sealed jar in the refrigerator for 1 month.

-----

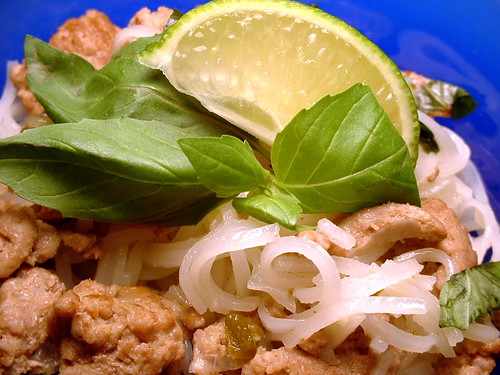
With the sambal finished, I could go ahead and use it in a dish -- namely, Ming's chicken and rice noodle stir-fry. The dish consists of ground chicken, sliced shallots, scallions, basil, and rice noodles tossed in a sauce made of sambal, lime juice, fish sauce, and sugar. I'm allergic to seafood and I don't know if fish sauce would cause me problems, so I left it out and just had a lime juice/sugar/sambal sauce. I also used ground turkey instead of chicken, because the supermarket didn't have any ground chicken.

Turkey and rice noodle stir-fry


Technorati tags: , , , ,

Wednesday, September 13, 2006

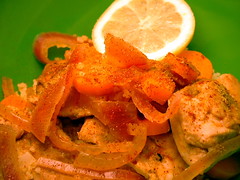
Tangy chicken "stew" with couscous

Most stews are heavy and hearty, and that's why this is "stew" in quotation marks. It's considerably lighter, with a thinner sauce than most stews have. I didn't want to make a full-on stew, but since the weather is getting cooler, I wanted something with a little more substance than my usual summer meals. The vinegar and lemon juice give the broth a nice tart and tangy flavor. Couscous tends to soak up liquids like a sponge, which is why it's the starch of choice here; the sauce gets absorbed into the couscous, giving the tiny pasta lots of flavor. However, I have met people who don't like couscous (namely my mother), so rice would work as well.


Tangy chicken "stew" with couscous
serves 4

For the couscous:
1 1/2 cups chicken broth
1 cup uncooked couscous

Bring the chicken broth to a boil. Add the couscous, cover, and remove from heat. Set aside while making the rest of the dish.


For the stew:
2 tablespoons extra virgin olive oil
6 boneless skinless chicken thighs, cut into large bite-size pieces
2 teaspoons kosher salt
Freshly ground black pepper to taste
1 teaspoon ground cumin
1 teaspoon paprika
1/4 teaspoon cayenne pepper (optional)
2 carrots, peeled and sliced into 1/4" rounds
1 red onion, roughly chopped
2 cups chicken broth
2 tablespoons apple cider vinegar or red wine vinegar
Zest of 1 lemon
Juice of 1/2 lemon

Heat the oil in a Dutch oven or deep skillet. Add the chicken, and sprinkle with salt, pepper, cumin, and paprika. Allow chicken to brown on all sides, about 5 minutes total. Add the carrots and onion and cook, stirring, for 2 minutes. Add chicken broth, vinegar, lemon zest, and lemon juice and bring to a boil. Lower the heat to a simmer, cover, and cook for 8 minutes.

Fluff up the couscous with a fork. Serve the chicken mixture in bowls over the couscous.

Technorati tags: , , ,

Tuesday, September 05, 2006

Sourdough

To make sourdough bread, you need two things: a healthy and active starter, and some patience.

Wild yeast takes longer to get its job done than commercial yeast. I can turn out a loaf of country white bread in about 6 hours, and that includes making a sponge and letting the dough rise twice. A bare-bones bread recipe with no sponge and only one rise takes me 3-4 hours. Sourdough? Anywhere from 30-48 hours. Starting on a loaf of sourdough means knowing that you'll be getting the end result some time the next day.

The first phase involves expanding your starter. This wakes up your yeast and multiplies it to quantities that will be able to leaven a loaf of bread. Start with two tablespoons of stiff starter, and feed it with about 1/3 cup of bread flour and 2 tablespoons of water. Let it double, then toss half of it, and feed the rest with 2/3 cup of bread flour and 3 1/2 tablespoons of water. Let it double again.

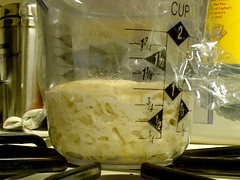
Sourdough starter

This is my starter expanding. The bubbles all around the sides are a good sign. This stage can take up to 16 hours, unless you have whatever weirdo mutant strain of yeast that I have in my apartment, which gets the job done in less than 4 hours.

So, now there's an expanded starter, and now you can actually start making your dough. Take 2/3 cup of the expanded starter, add 1 1/4 cups of bread flour, 2/3 cup of warm water, and a teaspoon of salt. Knead for 5 minutes, let rest for 20 minutes, then knead again for 5-10 minutes.

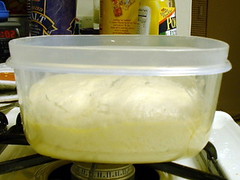
Let the dough rise for an hour, and punch it down. Repeat. Then let the dough rise until doubled.

Rising sourdough

Ok, now the dough is risen. However, it's very moist and very soft, and if you threw it in the oven right now, you'd end up with a big flat pancake...

Drying out the skin

...so the next step involves putting the dough into a towel-lined colander and letting it rise until it's doubled. This pulls moisture out of the dough, creating a skin that will hold the dough together when you bake it. (It also makes a spiffy design on the crust.)

After 25 minutes of baking...

Sourdough loaf

Finished sourdough

Crusty outside, chewy inside, with a nice tangy flavor. Not bad for a day and a half, especially considering that you don't have to do anything with the dough for most of that time. I should definitely do this more often than once every 5 months.

Technorati tags: , , ,

Friday, September 01, 2006

Grissini

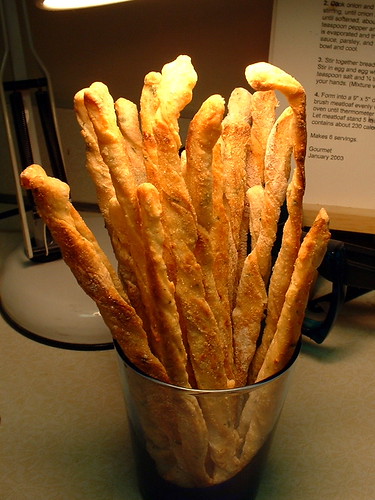
Homemade grissini


There's a bit of a chill in the air today. After an incredibly hot summer, this is good news... but it's even better news for those of us who enjoy baking. Now, I like cooking and putting together meals, certainly. However, my true kitchen love is baking, especially bread baking. Cakes and cookies are all well and good, but there's something about getting my hands into a ball of dough that I find incredibly satisfying. No, no stand mixer here, just me and my skinny arms. :)

First off, anticipating the cooler weather that's coming, I got out my sourdough starter and fed it. It seems to have made it through the summer hibernation just fine, so there will definitely be some sourdough products making an appearance. The process for making sourdough breads isn't much different than the one for making cultivated yeast breads... it just takes much, much longer. They're worth it, though.

I also needed some baking instant gratification, so I made a batch of grissini (thin, crunchy breadsticks). I flavor mine with parmesan cheese, garlic powder, and cayenne pepper. They come out crispy, perfect for snacking. Personally, I like the kick from the cayenne pepper, but it can certainly be left out.
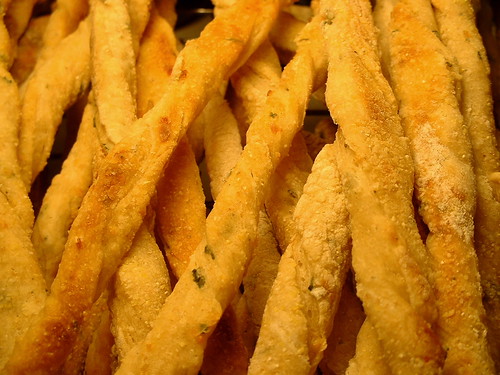
Homemade grissini - closeup


Grissini
Makes about 50 breadsticks

1/2 teaspoon instant yeast
1/2 teaspoon sugar
1/4 cup warm water (about 100 degrees)

2 cups bread flour
1/4 cup whole wheat flour
1 teaspoon salt
1 teaspoon black pepper
1/2 teaspoon garlic powder
1/2 cup grated Parmesan cheese
1 tablespoon minced herbs (basil, parsley, rosemary, thyme, and/or sage would work nicely)
1/4 teaspoon cayenne pepper (optional)
3/4 cup warm water (about 100 degrees)
Cornmeal for dusting

Bloom the yeast: Combine the yeast, sugar, and 1/4 cup warm water in a small bowl. Allow to sit for 5-10 minutes. If your yeast is alive and kicking, a foamy layer will develop. If this doesn't happen, try again.

Mix and knead the dough: Meanwhile, combine the bread flour, whole wheat flour, salt, pepper, garlic powder, Parmesan cheese, minced herbs, and cayenne pepper in a large mixing bowl. Whisk to evenly distribute the ingredients. Add the yeast mixture and 3/4 cup warm water to the flour mixture. Stir until the dough comes together and begins to pull away from the sides of the bowl. Turn the dough out on to a floured surface and knead lightly until it is smooth and elastic, about 5 minutes.

Allow the dough to rise: Lightly coat the inside of a large bowl (1-qt or larger) with olive oil. Transfer the dough to the bowl, turning to coat with oil. Push the dough down to create a flat surface, and make note of where double the current dough height is with a rubber band or piece of tape. Cover the bowl with a lid or plastic wrap, and allow to rise at room temperature for one hour. Gently deflate the dough, then re-cover and allow to rise for another hour. Deflate the dough again, and let it rise for one hour or until doubled the initial volume.

Prepare the oven and baking sheet(s): Preheat the oven to 375 degrees. Position an oven rack on the second slot up from the bottom. Line a baking sheet with parchment paper.

Shape the dough and bake: Lightly dust your work surface with cornmeal. Cut the dough into quarters. While working with one piece of dough, cover and refrigerate the other pieces. Form one dough quarter into a ball and flatten it gently. Dust the top with more cornmeal. Roll out the dough to 1/8" thick, and then cut into 1/2" wide ribbons with a knife or pizza cutter. Give each ribbon a few twists before setting on the baking sheet. Brush each breadstick with olive oil and sprinkle lightly with cornmeal. Bake for 14-18 minutes or until golden. Repeat with remaining dough. If you have multiple baking sheets, you can, of course, work with two or more dough batches at once.

Finishing: Allow the breadsticks to cool. They will still be slightly soft and chewy at this stage, and you can leave them this way if desired. If you want them completely crunchy, return them to the oven at the lowest possible temperature setting (pilot light, if you have that option) for about an hour or until totally crisp.

Technorati tags: , , ,

Wednesday, August 30, 2006

Stuffed Peppers

Somehow, I had never made stuffed peppers until this evening. Since I'm a big fan of bell peppers, this situation had to be rectified. So, I started off by looking at the stuffed pepper recipe in Cooking from the Heart of Spain, a recipe which says that it "deliciously celebrate[s] summer". We're approaching the end of summer here, so I'm all for celebrating it while I still can. I used that recipe as my starting point, made some changes, and ended up with something a bit lighter and more low-maintenance than the original. And they doubly celebrate summer because they're done entirely on the stovetop: no oven. :)

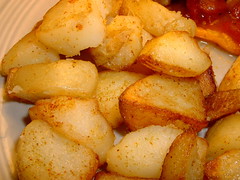
To go with the peppers, I made the "Hot Potatoes" (Patatas Bravas) from the same book. They're very easy: shallow-fried potatoes that are then tossed with salt, cumin, and cayenne pepper. The cumin in the potatoes brought out the cumin in the stuffed pepper sauce, and the heat from the cayenne balanced very nicely with the sweetness of the peppers and the acidity of the tomatoes.

Stuffed peppers Patatas Bravas


Sort-of Spanish Stuffed Peppers
serves 4

4 bell peppers
2 slices of bread
Milk (for soaking the bread)
1 egg, beaten
1 large onion, chopped
3 garlic cloves, minced
2 teaspoons salt
1/4 teaspoon nutmeg
Freshly ground black pepper
1/4 cup parsley, chopped
1 1/4 lbs ground turkey
1 tablespoon all-purpose flour
1/4 cup olive oil or 2 tbsp bacon fat
1 14.5 oz can diced or crushed tomatoes (diced = chunkier sauce, crushed = smoother sauce)
1/2 cup low sodium chicken broth
1/4 teaspoon ground cumin

Cut around the stems of the peppers, and remove the stems and seeds.

Soak the bread in milk until softened. Squeeze out excess milk and discard, then crumble the bread into a mixing bowl.

Reserve 1 1/2 teaspoons of the beaten egg in a shallow bowl or saucer. Add the remaining egg to the bread. Add about a quarter of the chopped onion, a third of the minced garlic, 1 teaspoon of salt, and all of the nutmeg, pepper, parsley, and ground turkey. Combine well. Stuff the peppers with the turkey mixture. (You may have some turkey mixture left over; don't try to overstuff the peppers in order to use up all of the stuffing.)

Dip the open ends of the peppers in the reserved egg, and then into the flour.
Heat the oil or fat in a deep skillet over medium heat. Fry the peppers, floured side down. Once the floured sides have browned, add the remaining chopped onion and garlic to the pan. Turn the peppers to fry on all sides, about 8-10 minutes total. Add the tomatoes, chicken broth, cumin, 1 teaspoon salt, and pepper to taste. Bring to a boil, then reduce heat to low, cover, and simmer for 45 minutes, turning the peppers every 15 minutes. Remove the lid and cook for another 20 minutes to reduce the sauce.

Cut peppers in half lengthwise and serve with tomato sauce spooned over them.

Technorati tags: , , , ,

Sunday, August 20, 2006

English muffins

There is cornmeal all over my kitchen... an acceptable consequence of making English muffins from scratch.

Since you can buy decent English muffins at the grocery store, they're not something that people make at home very often. I was curious to see what homemade ones would be like; this was my first time making them, and results taste much different than the store-bought ones I'm used to. The homemade muffins are more substantial, with more noticeable butter and yeast flavors.

The recipe I used came from The 'Good Enough To Eat' Breakfast Cookbook by Carrie Levin, chef/owner of Good Enough to Eat in NYC. GEtE is known primarily as a breakfast/brunch place, and this cookbook is full of all the typical yummy breakfast foods: eggs, pancakes, muffins, waffles, and so on.

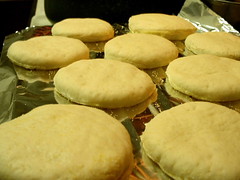
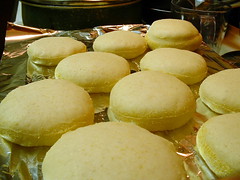
Since this was a first attempt, I followed the recipe pretty closely, even the parts that seemed odd. For example, you scald the milk, add it to the flour, and then add the bloomed yeast. I thought that perhaps the scalded milk might be hot enough to kill the yeast. Turns out that I had nothing to worry about. Here's the before and after:

English muffins before rising English muffins after rising

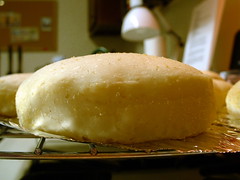
Risen English muffin

Yes, the yeast was functioning just fine.

I did have to fudge a couple of things. I do not own a biscuit cutter. The recipe says that you can also use a clean tuna can... except that I've never bought a can of tuna in my life (seafood allergy). So, my makeshift biscuit cutter: a clean glass.

I also don't have a griddle, but I do have frying pans, so I used one of those for the actual cooking. And although the recipe doesn't say to do this, I cooked the muffins in a little bit of butter. Just sticking the muffins in the hot pan with no oil whatsoever felt wrong. And since butter helps with browning, they came out looking kinda pretty:

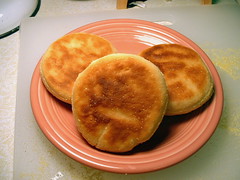
Cooked English muffins

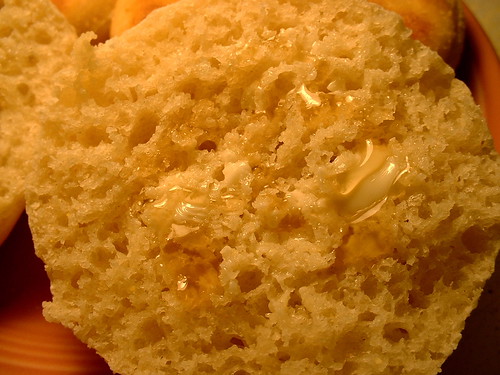
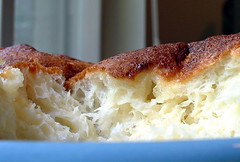
And once they were done, I opened one up (in proper English muffin fashion, with just a fork). Nooks! Crannies! They have the official English muffin texture. I immediately had one with some butter and honey.

Cooked English muffin

I normally skip breakfast, but I'll make an exception for these. Yum.

Technorati tags: , , , ,

Saturday, August 19, 2006

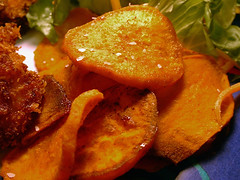
Fried chicken with bacon; Spicy baked sweet potato chips

Fried chicken is one of those great foods where you have to work really hard to mess things up. Everybody has their own recipe, their own tricks, their own technique, and it's always good (with the possible exception of Sandra Lee's fried chicken, which involves salt and flour, nothing more... it's a bland mess).

I came across a fried chicken recipe that I knew I had to try as soon as I saw it, because it had the magic word in it: Bacon.

Fried chicken and baked sweet potato chips


This ingenious idea was in The Cook's Book, a very large cookbook with chapters that are authored by different chefs according to their specialties. It discusses the basics, but also goes beyond the basics with some unique recipes. It seems like it would be a great choice for someone starting a cookbook collection (my copy is visiting from the library).

Start with 2 lbs of chicken, cut up. Add Dijon mustard, salt, and cayenne pepper. Pour buttermilk over chicken. While the chicken sits in the buttermilk, fry 4 rashers of bacon until crispy. Crumble the bacon into 3 cups of breadcrumbs. Heat up oil. Dredge chicken pieces in the breadcrumbs and fry until golden. Done.

Fried chicken Baked sweet potato chips

I also made some sweet potato chips flavored with brown sugar and cayenne pepper, to match up with the bacon flavor in the chicken. I baked the chips in an attempt to pretend that at least part of this meal was healthy. The "chips" won't come out crispy, but they're still quite tasty (if I do say so myself).


Spicy Baked Sweet Potato Chips
Makes 2 servings

2 sweet potatoes, peeled
2 tbsp olive oil
1 tbsp brown sugar, packed
1/4 tsp cayenne pepper (or to taste)
1/2 tsp salt

Preheat oven to 400 degrees. Slice the sweet potatoes into rounds between 1/8" and 1/4" thick (I used my food processor's slicing blade for this).

Combine the olive oil, brown sugar, cayenne pepper, and salt in a large bowl. Add the sweet potato slices and toss to coat evenly. Spread the slices out on a baking sheet. Bake at 400 degrees for 30 minutes, tossing once to minimize sticking.

Technorati tags: , , , ,

Sunday, August 13, 2006

Pudding cake

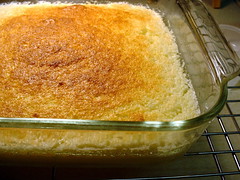
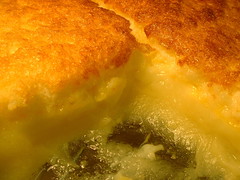
The person who discovered pudding cake is a genius. This may be the most perfect dessert ever: on top, a moist cake layer, and underneath, a thick pudding layer.

Lemon Pudding Cake Lemon Pudding Cake

This particular one is a lemon pudding cake. As you can see, it came out mostly pudding, with a pretty thin cake layer; I'm actually ok with that. Texture-wise, the cake layer reminds me much more of a soufflé than a typical cake; again, that's fine with me. It's a pretty low-maintenance warm dessert... and yes, warm is KEY, because the pudding layer thickens as it cools, leaving you with a pudding layer that's almost a solid gel. Yeah, it'll still taste fine, but it's nowhere near as appetizing to look at.

This recipe at Epicurious is pretty similar to the recipe I used (Mine had 1/3 cup of lemon juice, 3/4 cup of sugar, 4 tbsp of melted butter, and I used skim milk instead of whole milk). If lemon isn't your thing, Epicurious has several other recipes for this type of cake, including maple and blueberry.

Technorati tags: , , ,

Thursday, August 10, 2006

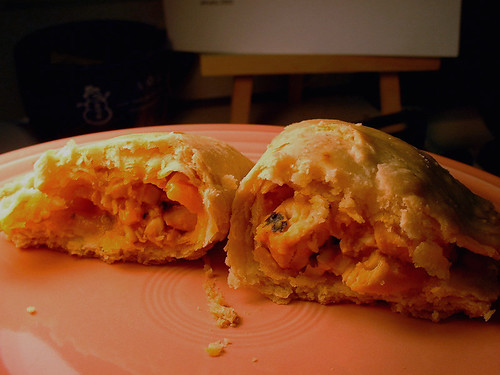
Empanadas Filled with Spicy Chicken

This recipe comes from Janet Mendel's Cooking from the Heart of Spain, which is full of recipes from the La Mancha region of Spain. There are some recipes in this book that have me drooling just from reading them (sadly, no gorgeous food porn pictures in this book). I'll almost certainly be trying out other recipes from this book over the next few weeks.

Tonight's recipe was one for empanadas. It's not exactly a low-maintenance recipe, but was well worth some extra effort... I even roasted my own pepper, which is something that I love doing. The results were fantastic. The filling has a really wonderful flavor from the oregano, cumin, and roasted pepper, and the pastry comes out light and flaky. I had one right out of the oven, and didn't even care that I burned my mouth; they're that good.

Things I will do differently next time:
  • Refrigerate the dough. The recipe specifically says to leave the dough at room temperature for the entire time it rests, but this made the dough very sticky and difficult to work with. I will say that the finished product is light and flaky, but refrigerating the dough would keep even more of the butter from melting before the dough is baked... which should yield something even flakier.

  • Not go quite as light on the cayenne pepper. I usually like hot, spicy food, but this was the first time I made this and I didn't want cayenne to end up as the main flavor. However, the filling is substantial enough that it could hold up to more heat.

  • Not drop my open flour container on the floor.
Empanada
(I did have the recipe posted here, but I removed it, because I don't want to go against anyone's copyright.)

Technorati tags: , , ,

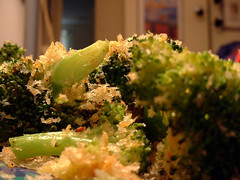
Broccoli with garlic breadcrumbs

Broccoli

This is my go-to broccoli side dish recipe. If you don't have panko, regular breadcrumbs work just fine. You can add parmesan cheese, lemon zest, red pepper flakes... it's a good basic recipe with lots of room to improvise.


Broccoli with Garlic Breadcrumbs
Makes 4 servings.

1 lb broccoli, trimmed and cut into 2-3"-wide florets
3-4 garlic cloves, minced
3-4 tbsp olive oil
1/2 cup panko breadcrumbs
1/4 teaspoon salt
1/4 teaspoon pepper

Steam the broccoli for 5-10 minutes (5 minutes will give you relatively crisp broccoli, 10 minutes will make it softer -- whatever your personal preference is).

Meanwhile, cook the garlic in olive oil in a 12" skillet over low heat, stirring occasionally, until just barely golden (about 5 minutes). Add the panko, salt, and pepper, stirring to evenly coat the panko with the garlic oil. Increase heat to moderate and cook, stirring occasionally, until the panko is golden (about 3 minutes). Remove the skillet from heat.

Add the steamed broccoli to the crumb mixture in the skillet and toss to coat.

Technorati tags: , , ,

Saturday, August 05, 2006

Nun's Puffs

Baking during the summer isn't always a pleasant endeavor. Here in Maryland, we've been going through a nasty little heat wave involving multiple days of temperatures at or above 100 degrees. This results in me not wanting to crank my oven up to 400+ degrees... which means that there isn't much baking for me during the summer months. I happen to love baking (and am quite good at it, if I do say so myself), so I get cranky when it's too hot for extended oven usage.

Today, we had a bit of a break in the heat wave. Nothing substantial, but the high today was right around 90. It felt downright cool outside. The first thing I did was dust off my recipe for Nun's Puffs:

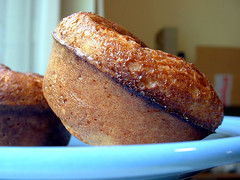
Nun's Puffs

I chose these for a couple of reasons. First, I have a major love for eggy quickbreads. More practically, a lower oven temperature (375) combined with the fact that they bake in a muffin tin means that the oven's on, but isn't cranked up super-high for a long time... it may be a bit cooler out, but it's still 90 degrees.

The batter for these is made in the same method as a pâte à choux; bring butter and your liquid (milk in this case) to a boil, add your flour and stir like crazy, then add eggs one at a time and continue stirring until you think your arm will fall off. The batter then goes into a greased muffin tin, and you sprinkle some sugar on top before baking. They end up being mostly savory, with a nice hint of sweetness on the top crust... very nice breakfast fare, drizzled with some honey.

Nun's Puffs

I used a recipe from the Better Homes and Gardens New Cookbook, which is something of a ubiquitous cookbook in many kitchens. However, if there's no copy handy, you can also see the recipe at Recipezaar or Everything2.

(I did have the recipe posted here, but I removed it because I don't want to go against anyone's copyright.)

Technorati tags: , ,

In a tiny kitchen?

Welcome to my brand-new food blog! I love cooking and baking, but I feel bad posting about my cooking experiments on my knitting blog. So, I finally sucked it up and started a separate blog for food stuff.

As for the title...
I live in an apartment, and my kitchen is 7' x 10'. Not much room for gadgets and small appliances, and the large appliances are definitely not state-of-the-art. For example, my oven doesn't have a window in the door or an oven light, so baking involves some guesswork. However, even with a tiny apartment kitchen and not a lot of stuff, I think I do some good cooking, and this is where I'll document it. Stay tuned. :)