Showing posts with label baking. Show all posts

Thursday, October 08, 2009

Chocolate Chip Pretzel Bars

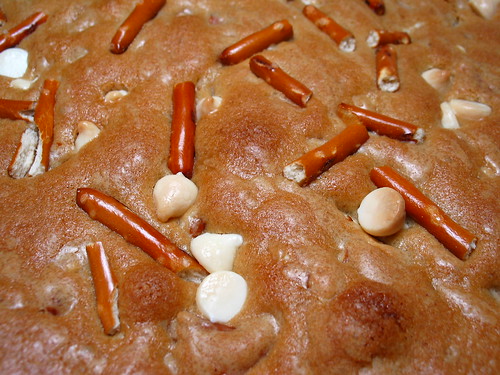
White Chocolate Chip Pretzel bars

This bar cookie recipe came from the August 2009 issue of Food and Wine magazine. I actually ended up making two batches, one for friends and one to take with me to work on Monday. Despite needing almost twice the recommended baking time, they were easy and fast to put together. I used white chocolate chips instead of semisweet or bittersweet, and omitted the sprinkles (I didn't think they needed sprinkles), but followed the recipe otherwise.

The cookies are loaded with brown sugar and butter, and are studded with chips and salty pretzel bits... it's a great combination, with that salty-sweet pairing that's so popular. They went over great!

-----

Recipe: Chocolate Chip Pretzel Bars from Food and Wine, August 2009

Space needed: Minimal
I used two mixing bowls: one smaller bowl for the dry ingredients, and a larger one for the wet ingredients. No kneading, no rolling, no cookie cuttering... great for limited counter space!

Sunday, June 14, 2009

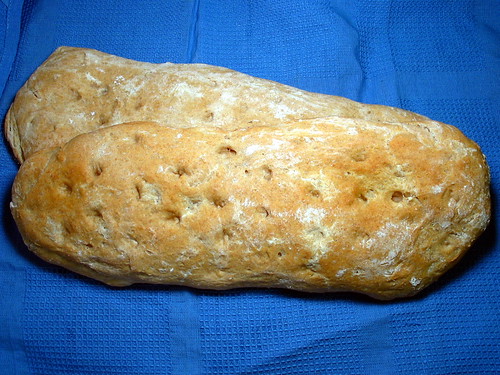
Armenian "Barbary" Bread

Armenian "Barbary" Bread

This lovely flatbread comes from Nick Malgieri's The Modern Baker. This book incorporates shortcuts into the recipes, for the "modern" baker who may not have time for a bread recipe that requires 3 rises and 12 hours. The book jacket states that the aim was for most of the recipes to have under an hour of prep time. If you're someone who loves baking but has trouble fitting it into your schedule, this is a cookbook you may want to take a look at. Breads, cakes, sweet and savory pies, quick breads... there's a very nice selection here.

Armenian "Barbary" Bread

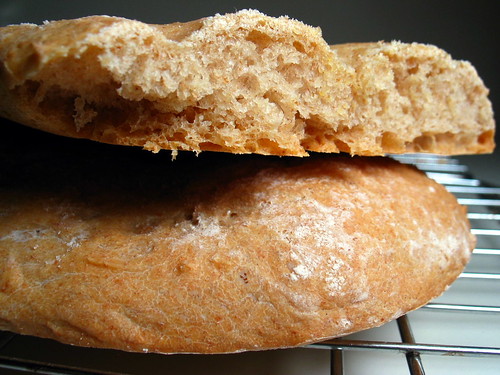
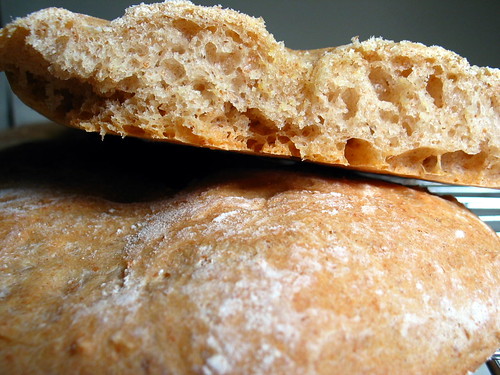
This came together very easily. A 4-to-1 mix of all-purpose flour and whole wheat flour, plus a couple of teaspoons of salt make up the dry ingredients. Another bowl gets the yeast and warm water, along with a couple of tablespoons of olive oil. Slowly add the flour mixture into the yeast mixture, give a quick knead, and set aside to rise for 1-2 hours. Divide the dough in 2, shape into long ovals, let it rise for another hour, and then bake for 20 minutes.

The finished bread has a wonderful flavor from the whole wheat flour and the olive oil. The whole wheat flavor isn't overpowering, but adds a nice subtle heartiness to it. We had this with beef stew, and the bread stood up to it nicely.

Armenian "Barbary" Bread

-----

Recipe: Armenian "Barbary" Bread from The Modern Baker by Nick Malgieri

Space needed: Moderate
A couple of bowls and enough counter space to be able to work the dough for a few minutes. The shaped loaves rise on the baking sheets for an hour, so you also need room to stash the sheet during the rising time. I was able to fit both of my loaves on one baking sheet, so I needed less room for that.

Cost: Under $5
$3.15 as written for two loaves. The two loaves should serve 7-8 people, so one serving runs about $0.40 to $0.45. The yeast price I have here is for the 3-pack of envelopes; bulk yeast is less expensive, but only worthwhile if you do a lot of baking.

Recipe amounts: AP Flour - $1.00; Whole wheat flour - $0.25; Yeast - $1.25; Olive oil - $0.65

Saturday, May 30, 2009

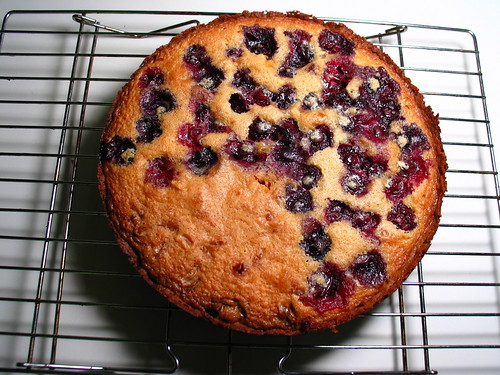
Brown Butter Blueberry Tart

I posted my results from a food terms quiz on Facebook a few days ago, and one of my friends responded with "Cook me a pie!"

Just to spite him, he's not getting a pie. He's getting a tart. TAKE THAT.

Brown Butter Blueberry Tart

This is going to my gaming group this evening: my adaptation of the Brown Butter Raspberry Tart from Bon Appétit's June 2009 issue. I switched blueberries in for the raspberries, and left out the berries completely in one quarter, using white chocolate chips as the "filling" instead. In case there's anyone who dislikes berries. Which, yes, is probable.

Tarts like this, where the crust is pressed into the pan, are perfect for smaller kitchens. No rolling out the crust! And like all recipes that call for a tart pan, I made this in a springform cake pan. Same removable bottom principle, but the springform is able to multitask a bit better. The tradeoff: it means that my tarts don't have a lovely fluted edge. I haven't had anyone complain yet.

What a great, simple way to let a batch of berries shine!

Brown Butter Blueberry Tart

Recipe: Brown Butter Raspberry Tart from Bon Appétit, June 2009

Space needed: Minimal
A couple of bowls (you could probably get away with one and just reuse the bowl you made the crust in to also make the filling), a saucepan, and a tart pan/other baking pan. I needed very little counter space for this.

Cost: Under $10
For the recipe as written, you'd be looking at about $9.00 for the whole thing. Most of that comes from the berries. Substituting a less expensive berry or finding a deal at a farmers' market would be an easy way to lower the price. Mine using blueberries came out to $5.

Recipe amounts: Butter - $1.25; Sugar - $0.25; Vanilla - $0.80; Flour - $0.30; Eggs - $0.30; Raspberries - $6.00

Wednesday, April 22, 2009

Dutch Baby with Lemon Sugar

April's issue of Gourmet had a lovely article featuring 5 different dessert recipes made with lemon and eggs. I was faced with the dilemma: which to make first?

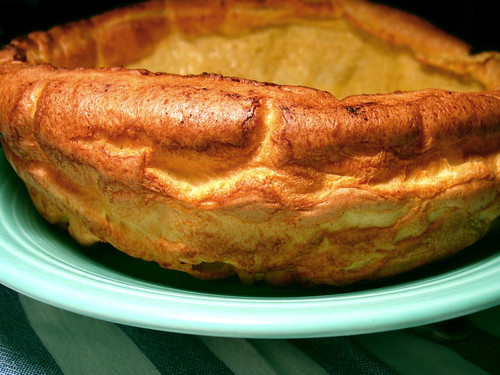
The winner ended up being the Dutch Baby with Lemon Sugar. This is basically one huge popover that ends up being shaped like a bowl. Popovers are my weakness, so I'm not sure it was a fair contest for the other recipes.

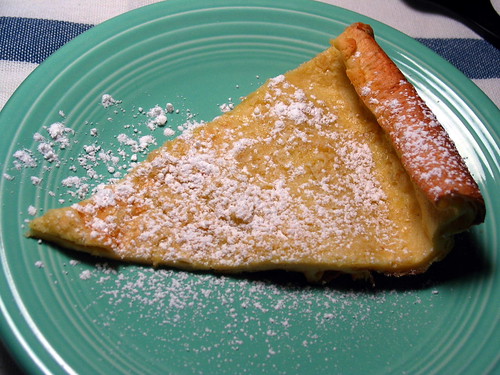
Anything you would put on pancakes or waffles would work as a Dutch baby topping: fruits, powdered sugar, syrup. The Gourmet recipe uses lemon sugar, made by combining lemon zest with the sugar. I added the zest to the batter instead, and finished it off with a dusting of powdered sugar.

I followed the advice of several reviews and cut the butter back by half. They weren't kidding. Two tablespoons is more than enough butter to generously coat the pan.

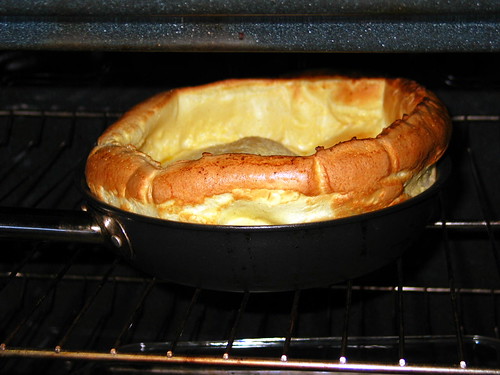
Piping hot in the oven. Puffy!
Dutch Baby pancake

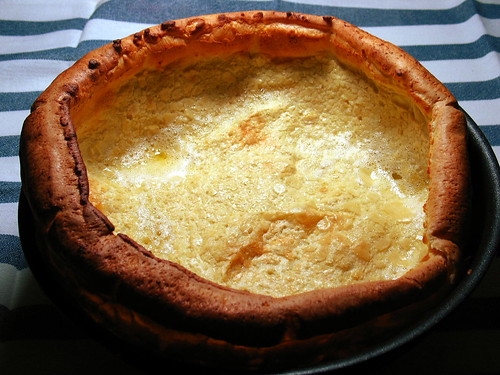
The center puff falls almost immediately once it's out of the oven.
Dutch Baby pancake

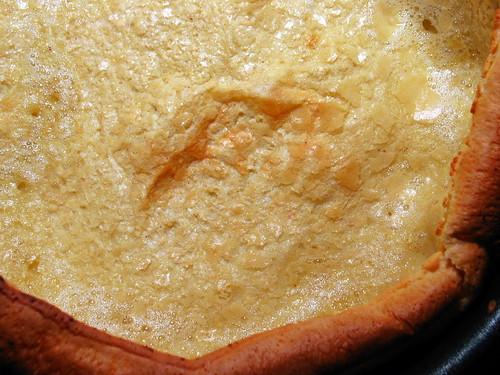
The crater, still dotted with melted butter from baking.
Dutch Baby pancake

Perfectly browned risen sides.
Dutch Baby pancake

Time for dessert! Or breakfast! Or brunch!
Dutch Baby pancake

I managed not to eat the entire thing in one night, refrigerated my leftovers wrapped in foil, and then reheated the foil-wrapped package in the oven at 350 degrees for 20 minutes for breakfast.

-----

Recipe: Dutch Baby with Lemon Sugar from Gourmet magazine, April 2009

Space needed: Minimal
One bowl and an oven-safe skillet. If you don't have an oven-safe skillet, this would work fine in an 8" or 9" baking dish or cake pan. Baking time might need to be adjusted for a different size pan.

Cost: Under $5
My total came out to $2.52 for the whole dish. This makes 4-6 servings (depending on serving size), so you'd be looking at anywhere between $0.42 and $0.63 per serving.

Recipe amounts: Sugar - $0.15; Lemon - $0.67; Eggs - $0.45; Milk - $0.30 ; Flour - $0.15; Vanilla - $0.20 ; Cinnamon - $0.05; Nutmeg - $0.05 ; Butter - $0.50

Monday, March 02, 2009

Scottish Baps

Slashfood posted a recipe a couple of weeks ago for Scottish Baps, a flour-dusted yeast roll. It probably won't surprise anyone to hear that I bookmarked the page.

I made these today for a snow day project. The recipe is easy to follow and very accessible. Nothing fussy; I would recommend these to someone as a "first yeast baking project" in a heartbeat. The only possible headscratcher is "caster sugar" in the ingredients. If you don't have caster sugar (a.k.a. superfine sugar), you can substitute regular table sugar.

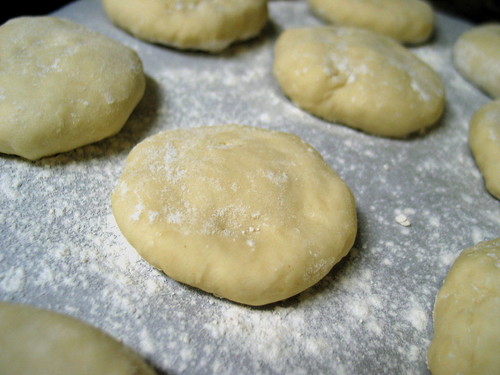
This dough came together nicely... so nicely that I didn't even have to knead it on a flat surface. I kneaded this in the same bowl that I mixed it in. After about 5 minutes of kneading, I left it to rise for an hour. Then some shaping, and the rolls started to take form:

Baps before baking

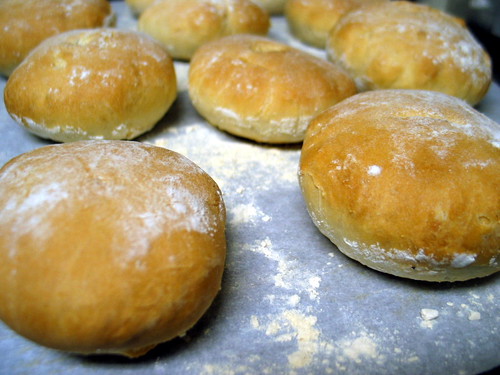
A sprinkling of flour gives them a nice dusty look when they're done.

Baps - done!

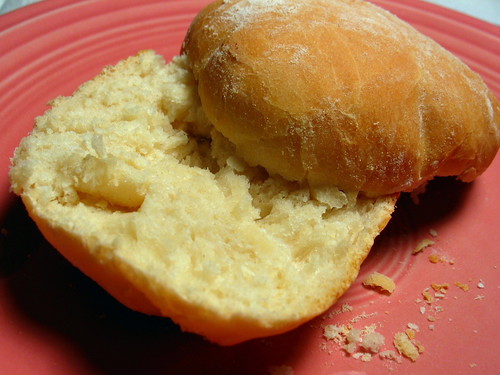
The finished rolls are light and soft and airy... apparently, one traditional use is to make a sandwich with fried bacon, butter, and a brown sauce. Curse you, my sadly baconless refrigerator!

Scottish Bap

Space needed: Minimal
For mine, I used one mixing bowl, one cookie sheet, and a measuring cup. I heated the milk and proofed the yeast in the measuring cup, then melted the butter in it as well.

Cost: Under $5
Total cost for the recipe is about $2.50 for 12 rolls.

Recipe: Simply Wonderful Scottish Baps from Slashfood.com

Sunday, January 11, 2009

Buttermilk Quick Bread

I decided today to break the baking lull that's been going on around here. And in honor of health-conscious New Year's resolutions, and the fact that I had buttermilk that I wanted to use up (I'll leave it to you to figure out which one figured in more heavily), I give you the figure-friendly Buttermilk Quick Bread from Cooking Light's January 2009 issue.

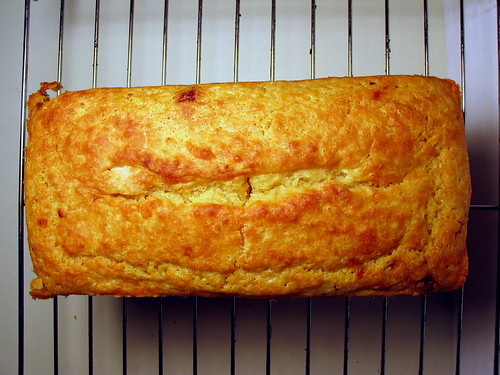
Let me tell you, I love baking but I don't always have the best luck with quick breads. I was thrilled to open the oven to find this gorgeously browned loaf waiting.
Buttermilk Quick Bread

After a long 10 minutes, I cut into it, hoping that the exterior wasn't just taunting me. I feared finding an undercooked mess, or a dried-out crumbly loaf, or a brick...

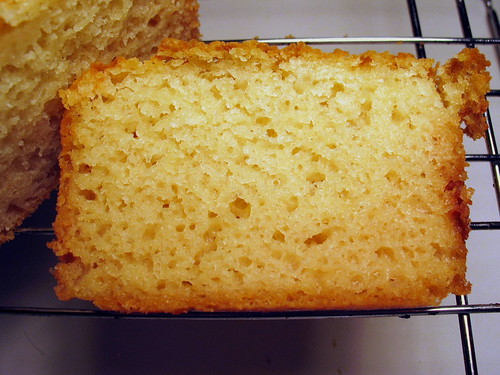
Instead, I got this:
Buttermilk Quick Bread

Lovely, moist bread. There's a nice sweetness to it from the sugar, and the buttermilk really shines here. The sweet/savory aspect reminded me a bit of cornbread.

Big points for easiness. Mix ingredients; bake. In the interests of saving myself a tiny bit of clean up, I melted the butter in the loaf pan in the oven while it was preheating. This gave me the melted butter and the greased pan in one step, and I didn't have to get out another bowl for butter melting purposes. Score!

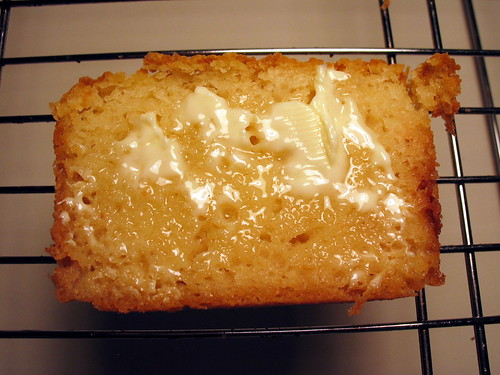
Buttermilk Quick Bread

Cooking Light's nutritional info says that this has 137 calories and 4.6g of fat in a slice. You'd never guess from eating it. Yum.

Recipe: Buttermilk Quick Bread from Cooking Light magazine, January 2009

Sunday, December 14, 2008

Maple Leaf Cookies

For once, I had my annual cookie swap contribution picked out in advance. And I'm talking a couple of months in advance.

Maple Cookies

Martha got me good, with a recipe for Maple Leaf Cookies as the "cookie of the month" in the November Martha Stewart Living. It's a basic sugar cookie, but with brown sugar and maple syrup added to give it a slightly deeper flavor. I am a complete sucker for maple, so I copied this cookie recipe as soon as I saw it.

I got 6 dozen out of this recipe, despite rolling the dough thinner than the recipe calls for AND using smaller cookie cutters than the recommended 3.5" maple leaf. Martha says you'll get "about 8 dozen".

The cookies as they come out the oven are not very sweet at all, and you could easily stop there and have some nice tea-or-coffee biscuits. The final step of brushing with maple syrup and sprinkling sugar on top adds a nice amount of sweetness to them. The maple flavor is there, but pretty subtle.

I didn't bother with the repeated dough freezes called for in the recipe. I almost always roll out cookie dough between sheets of plastic wrap or parchment paper, which lets me get away with a stickier dough. Any time it felt like the dough was getting too warm, it went into the refrigerator for 10 minutes.

I used regular granulated sugar for the final step, instead of sanding sugar. They still came out sparkly and sugary:

Maple Cookies

Now I just have to keep myself from sampling any more. I've gone through the leftovers already, so all that's left are the packages for my coworkers. :)

Recipe: Maple Leaf Cookies from Martha Stewart Living, November 2008

Wednesday, December 05, 2007

Homemade Thin Mints

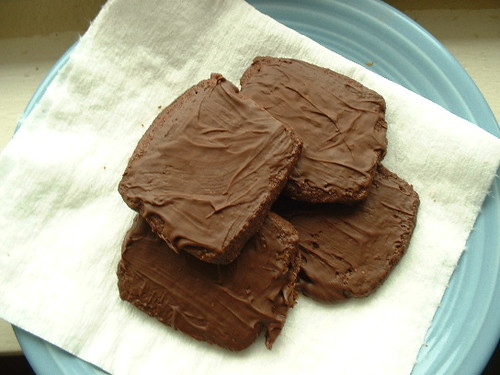
If you work with me, and you're doing the cookie swap, this is what you're getting from me: Heidi Swanson's All-Natural and Homemade Thin Mints.

All-Natural and Homemade Thin Mints

I've been looking for an excuse to make these since she posted the recipe back in 2006. I don't bake sweet stuff for myself very often, and we have so many birthdays at work that I almost feel guilty bringing in sweets on other days. I forgot about the recipe when I was doing last year's swap, but I remembered this year!

The nice thing about online recipes is that they frequently have a place where people can leave comments. You can tell pretty quickly which comments can be ignored ("I changed most of the ingredients and it didn't turn out right, so this is a bad recipe" is always a favorite) and which ones should be taken to heart. On this recipe, there were several comments about the dough being crumbly and difficult to work with, as well as comments saying that dipping the cookies in the melted chocolate leaves a chocolate layer that's too thick.

Crumbly, persnickety dough. That means that using cookie cutters is going to be a HUGE pain, so I changed the baking method just a bit. The recipe says to roll out the dough to 1/8" thick, cut out shapes, and bake for 10 minutes. Instead, I rolled it out closer to 1/4" thick and used a knife to cut the dough into 1.5" squares. I put them in the oven for 10 minutes per baking sheet, and due to the high butter content, they spread out nicely into 2" slightly rounded squares. I made three batches of the dough so I'd have plenty, and had a nice assembly line going for the mixing. I made one batch, put it in the freezer to chill, used the same bowl for a second batch (no cleaning the bowl necessary, since it's all going to be the same dough anyway), put that batch in the freezer, made the third batch, put that in the freezer, and took out batch #1 to roll out.

Mixing, rolling, and baking took about 2 hours from start to finish: not bad for 9 dozen cookies.
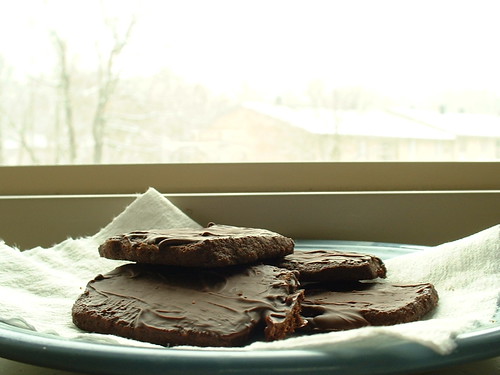
The full batch of cookies cooled overnight, and this morning, I did stage 2: chocolate coating. Instead of dunking each cookie in melted chocolate (which, according to many comments, left far too much chocolate on the cookies), I spread a thin layer of the chocolate on the cookies. It worked well, and had the added benefit of being messy fun. Doing this also allowed me to coat all of my cookies with one 12 oz. bag of semisweet chocolate chips instead of 3 lbs of chocolate--a smidge healthier is always a good thing, and the extra chocolate won't be missed. I got about 4 dozen cookies per batch of dough, and since I only made 9 dozen, I have the leftover dough in the freezer awaiting a chocolate craving attack. :)

The mint flavor in the chocolate is very subtle, and I would definitely add more of the peppermint extract on any future batches. This isn't just because I used less chocolate, because even the chocolate by itself doesn't have that strong mint flavor that the GS Thin Mints have.

All-Natural and Homemade Thin Mints

Playing around with chocolate wasn't a bad way to spend the first snowy morning of the winter!

Friday, November 23, 2007

Cranberry Eggnog Tart

As the baker in the family, I'm always responsible for bringing bread/rolls and dessert for Thanksgiving dinner. I didn't have much trouble figuring out the rolls -- the "butter dipped rolls" from the Bread Bible. This dough took forever to rise, so there's a possibility that I need to freshen up my yeast supply. The finished rolls were very dense and buttery... I was reminded a lot of crescent rolls, both in flavor and texture.

A dessert choice took a little while to hit me. Most "traditional" Thanksgiving desserts are things that at least one person in my family won't eat or (in my case) is allergic to. I've relied on cakes for the last few years, since they transport well. For whatever reason, I couldn't find a cake recipe that I really wanted to make this year.

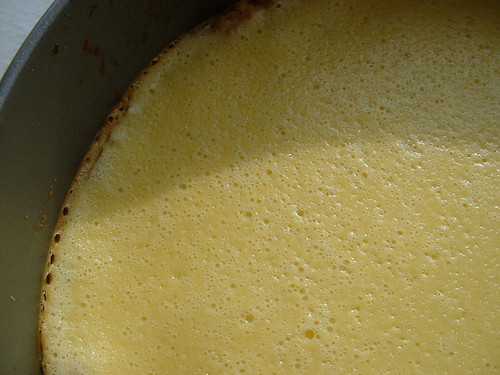
I turned to Epicurious, like I usually do when I'm in any kind of food quandary. They had picture slideshows of Thanksgiving recipes, including one of "Thanksgiving Pies and Tarts". Most of the recipes fell into the "Only one person would actually eat that" category or the "That has nuts and would make me puffy and unpleasant" category. And then I saw the Cranberry Eggnog Tart. Cookie crust on the bottom, thin layer of cranberry jam, cheesecake layer flavored like eggnog, and another layer of jam on top. The crust and the cheesecake are done in the food processor, and the jam is a basic stovetop cranberry sauce put through a strainer. Easy prep, don't need to use every bowl in the kitchen to make it... perfect.

Cranberry Eggnog Tart, pre-cranberry

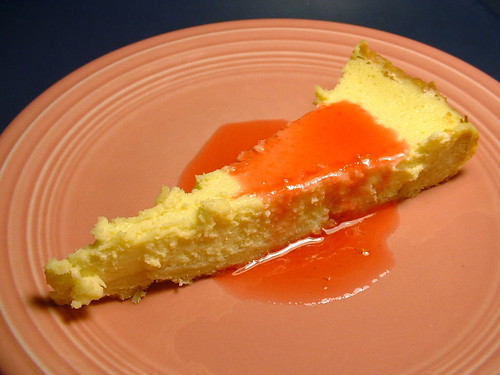
My lone problem was that the cranberry "jam" never became anything thicker than a syrup. Maybe my cranberries weren't ripe enough, maybe I didn't force enough of the solids through the strainer; regardless, it would have been impossible to use it for layers in the tart. However, it was a lovely consistency for a dessert sauce, so... problem solved.

Cranberry Eggnog Tart

This was my first time making a cheesecake, and I really liked the "no water bath" aspect of it; it's thin enough that you don't need to bother. It also seems like getting a store-bought jam (cranberry or otherwise) would work nicely in place of the from-scratch cranberry jam. Heck, maybe even a thin layer of lemon curd spread over the top.

This will probably be a strong contender for next year's Thanksgiving dessert as well.

Tuesday, October 16, 2007

Sweet Spelt Sourdough Bread

Oh no, she's breaking out the whole grains...

I promised healthier after my eggs and cheese and butter extravaganza in the previous post, so here's the Sweet Spelt Sourdough Bread from King Arthur Flour Whole Grain Baking.
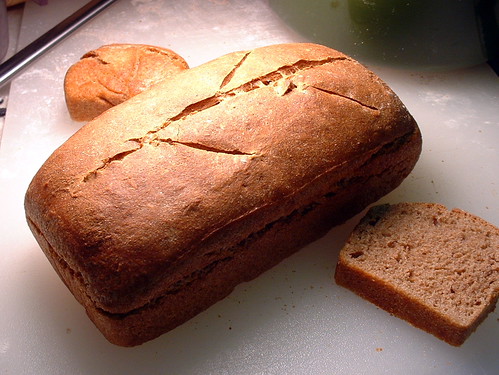
Spelt Sourdough Bread

Spelt is a new grain for me. The natural store that I shop at carries it, and I got a 1 lb bag on a whim a couple of months ago. I haven't found tons of recipes using spelt, as it's only recently started gaining popularity. This sourdough recipe not only provided a way to use some of the spelt that I'd bought, but also gave me an excuse to poke my starter and see if it was still going strong after several months hibernating in the refrigerator (answer: Yes. Sweet Fancy Moses, yes. It'll probably outlive me.).

The recipe calls for an all-spelt levain. Bakers have a whole bunch of terms that mean "starter".. levain is one of them. It's kind of an intermediate step between your permanent starter and the finished dough. Basically, take a little bit of your starter, feed it, and that's your levain. This recipe actually calls for you to begin with a spelt starter... my starter is good ol' AP flour and bread flour, and I absolutely wasn't going to convert the whole thing to spelt just for the 2 tablespoons that are used to make the levain. I used two tablespoons of my existing starter, fed it with the amounts of spelt and water specified, and set it on my warm oven to ferment. ("Room temperature" for bread tends to be warmer than my room temperature here. Any time I see that something needs to rise at room temperature, I turn on the oven as low as possible and set the rising container on top.)

Now, here's where my fun really started. The basic sourdough recipe that I've made in the past calls for the levain to expand for up to 16 hours... my yeast does this in 4 hours. Using the (faulty) assumption that I would also have a faster rise with this one, I started its 12-hour rise at 5:30 pm on Friday. I figured, even if it took half the time called for, I'd still be able to make the dough around 11:30, nap during rise times, and take fresh baked bread in to work with me Saturday morning.

Of course, this time it took the full 12 hours to rise. I stashed it in the fridge so it wouldn't continue to expand so quickly while I was at work and then out Saturday evening. I got the levain out on Sunday morning, let it come up to room temperature, and then made my dough. This dough was hard as a rock. It sucked up all the liquid and still left about half a cup of dry flour on the bottom of the bowl. I added enough water to make a very wet and loose dough with the flour that hadn't been absorbed, and folded that into the rest of the dough. Slowly, it started to loosen up to a point where I could actually knead it.
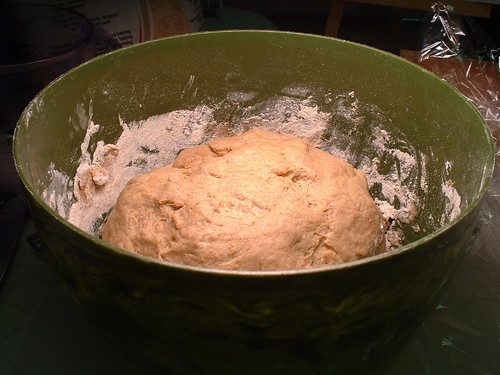
Spelt Sourdough Bread

From there, all that was left was to let it rise, shape it, slash it, and stick it in the oven. The recipe calls for one 8" x 4" loaf pan... the one size I don't have. I split my dough into one 7" x 3" and two mini-loaf pans, baked the two mini-loaves for 30 minutes each and the larger one for 40 minutes. After all the various things that had gone wonky with this bread, I wasn't expecting much, so I was very pleasantly surprised to pull out 3 nice, risen, crusty loaves of bread.

The flavor of this is completely unlike any bread I've ever had, and one mini-loaf was entirely gone within two hours. The most surprising thing to me was that, while it smells like regular ol' whole wheat bread, there's none of the bitterness that you sometimes get with whole wheat flour. The finished bread is slightly sweet, slightly tangy (from the natural starter), with a dense crumb that's not overly chewy. Great toasting bread.
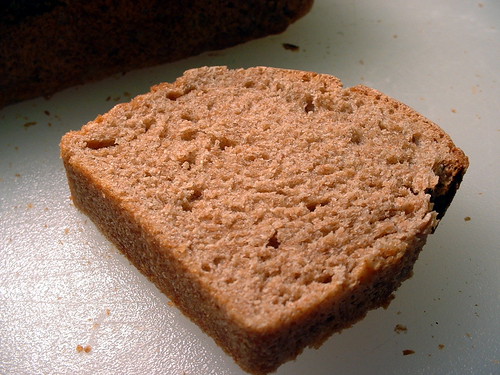
Spelt Sourdough Bread

Monday, September 10, 2007

Sour Cream Fudge Cake

As we know by now, I like to bake. Mostly, I lean towards savory things like breads and rolls, and especially yeasted recipes that let me knead dough for 15 minutes. However, for my birthday buddy cake today at work, I really couldn't show up with a birthday loaf of rye bread.
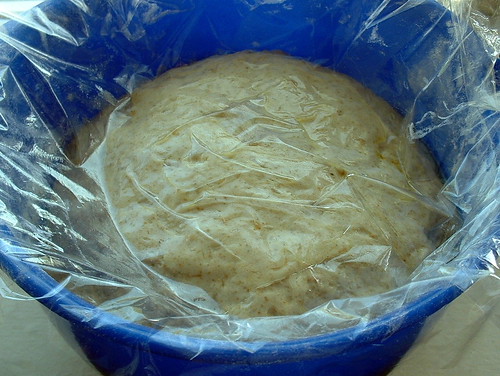
My buddy had requested chocolate, and as I paged through Tish Boyle's The Cake Book, I saw many MANY chocolate cakes. The one that I settled on won out for the simple reason that it can feed a crowd: Sour Cream Fudge Cake (p. 140) with White Chocolate Cream Cheese Frosting (p. 311).

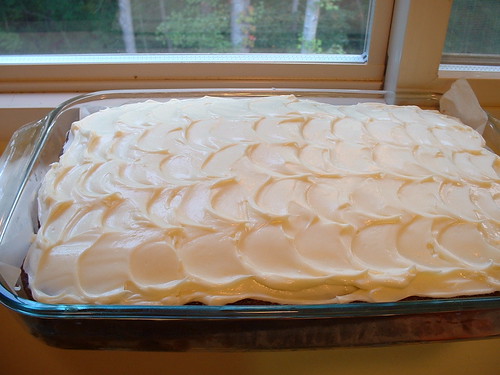
Sour Cream Fudge Cake with White Chocolate Cream Cheese Frosting

It took a little bit of time, but not an unreasonable amount. Both the cake and the frosting required double boilers, and the cake had lots of "add ingredient x in three batches, mixing thoroughly after each addition". I made the cake Sunday night, and got up early Monday morning to make the frosting. I figured, with a cream cheese frosting, fresher is better. I have no cake decorating tools or skills, but I think the pattern came out nicely. Looks like waves, or dragon scales, depending on how you look at it.

It went over very well, despite being just a hair on the dry side. Something in the fridge at work smelled funky and I didn't want the frosting to absorb any weird flavors, so I only had the cake in there for about 3 hours and then pulled it out. The three hours at room temp before we cut into it... it lost a bit of moisture, but not too much. The cake was dense and chocolaty, but not overly rich or sweet. I could eat the frosting by the spoonful. I know white chocolate can sometimes be almost cloying, but the tang from the lemon juice and the cream cheese cuts right through that. The white chocolate ends up being more of a background note.

I've already been told that they're signing me up for dessert duty for our holiday party, and that I'm not getting a vote. :D

Tuesday, July 31, 2007

Monkey Bread

This was the most "wizard" looking baked good I could think of to bring in for our mondo Hogwarts extravaganza day...

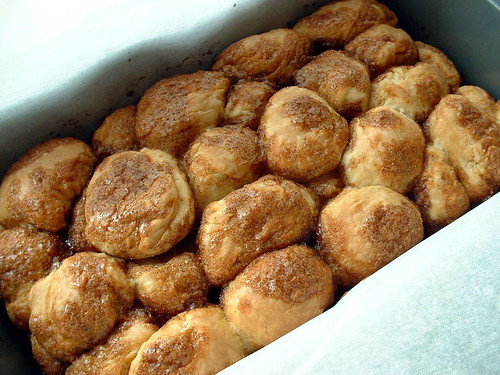
Monkey Bread

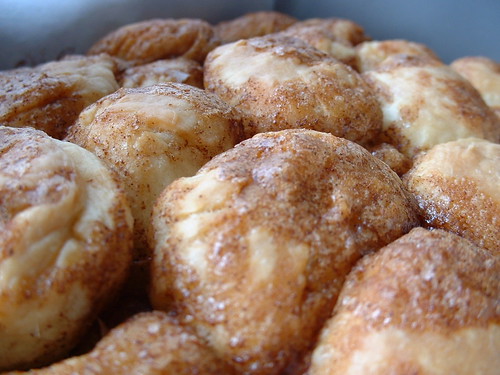
Monkey Bread from The Bread Bible, tweaked a little bit to cut down on the sticky/gooey factor. Sticky doesn't work well in a library. I didn't use all of the brown sugar/butter mixture, and I left out the raisins, pecans, and glaze entirely. Still turned out tasty and moist, but not so sweet that it was cloying. This is a nice thing to make for a large group of people; it's already portioned and everyone can just tear off however much they want.

No angel food pan here, so I made it in two standard loaf pans instead. It took about 45 minutes to bake.

I had been intending to dye the dough 4 or 5 different colors so that the individual dough balls would be different colors. Good in theory, but I ended up not having time to do it. I dyed some of the dough pink, and wound up with a nice pink swirled dough in some places.

Monkey Bread

Monday, May 14, 2007

Cinnamon Raisin Loaf

I've been wanting to bake something to bring into work, and decided to make the Cinnamon Raisin Loaf from The Bread Bible (minus the raisins). It struck me as something that would be nice to have early on a Monday morning as we're getting ready for another week of lost library cards and weird altercations in the parking lot.

And if you can't tell, yes, I'm more-or-less baking my way through this book. "More or less" because I'm allergic to nuts, and there are a few nut-heavy recipes in there.

This bread, again, starts out with a dough sponge. Even though yesterday wasn't especially humid, I ended up needing to add a CUP more flour than the recipe calls for just to get it from "thick batter" to "kneadable dough" status. This isn't one of the recipes with listed errors, but 1 3/4 cups of water plus about 4 cups of flour seems off to me. However, seeing that I was supposed to have a "soft dough", I just added flour 1/4 cup at a time until I had something that felt like the right texture.

Once the dough has risen, it goes into the refrigerator to firm up so that it can be flattened into a rectangle. The dough is then coated with an egg wash and a cinnamon-sugar mixture, rolled up, left to rise again, and then baked.

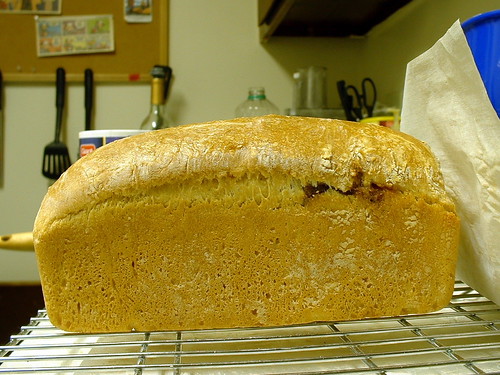
Finished loaf cooling:
Cinnamon Raisin Loaf (minus the raisins)

Yes, that's some cinnamon leakage on the side:
Minor cinnamon leakage

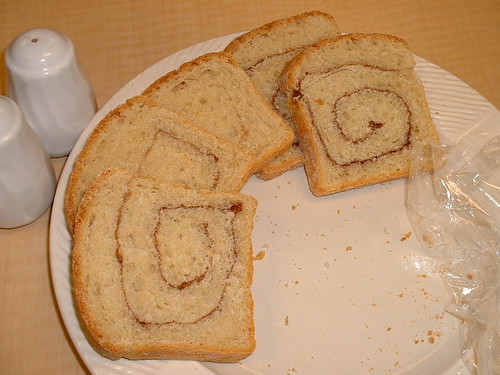
Sliced, showing actual SPIRALS!
Cinnamon Raisin loaf slices

The finished bread is moist and dense; I can't wait to try toasting up a slice or two. It's not too sweet, and makes a perfect breakfast treat.

Thursday, May 10, 2007

"Levy's" Real Jewish Rye Bread

Today was the day, folks. It was finally time to branch out beyond wheat-based flours. I am enough of a dork that I'm excited by that. :)

I decided to finally make use of some of the rye flour that I got a few weeks ago. This called for rye bread. Specifically, a loaf of "Levy's" Real Jewish Rye Bread out of The Bread Bible by Rose Levy Beranbaum.
My initial impression after reading the recipe? "Wow... that's all the rye flour that's used?" I naively had been expecting a rye bread to be mostly rye flour, but this particular one is mostly bread flour, with just 3/4 cup of rye flour.

This book hasn't let me down yet, so I went with it. I gathered up my ingredients: Arrowhead Mills Organic Rye Flour, Pillsbury bread flour, bulk instant yeast from the natural market, generic honey, sugar, and salt. The recipes calls for caraway seeds, which I didn't have, so I used sesame seeds instead. "Sesame Rye" had a nice ring to it.

Like many of the recipes in TBB, this bread starts with a sponge that ferments from 1 to 4 hours. I usually jump on my sponges after barely an hour, out of sheer impatience. This one, though, I allowed to sit for almost the full 4 hours. It was very perky by the end of the 4 hours, ready to be mixed and kneaded and left to proof.

Rye bread rising

I was very pleasantly surprised to see a tan dough, with lots of rye speckles... so much for my worries that there wasn't enough rye flour. The dough doubled in about 1.5 hours, got a gentle punching down via the "letter fold" method, and then doubled again.

Shaping time. I wanted this bread for sandwiches, so I eschewed the freeform loaf called for in the recipe in favor of a loaf pan. One last 45 minute rising, and then into the oven with some ice cubes for a nice chewy crust. It baked for 45 minutes, and came out like so:

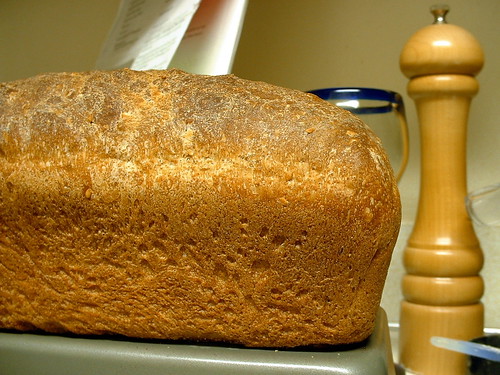
Loaf of Rye Bread

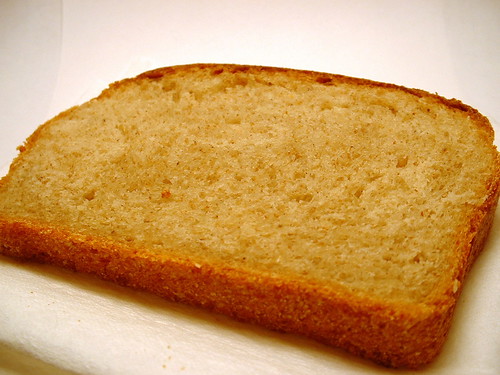
And I know bakers want to get a gander at the inside:
Rye Bread

slice of homemade rye bread

The crumb is dense, moist, chewy... I love this bread. It's absolutely going into my standard rotation. And since rye flour is a whole grain flour, it has all of those whole grain health benefits--excellent! :)
Sunday, April 22, 2007

The Easiest 100% Whole Wheat Bread Ever

For Earth Day, I decided to do a little bit of whole grain baking. I don't know if it's really in the "spirit" of Earth Day, but it made sense in my head at the time. :)

A couple of weeks ago, I accidentally got a copy of the King Arthur Flour Whole Grain Baking cookbook (it was the featured selection for the mail-order cookbook club I'm in, and I missed the reply date to stop them from sending it). Anyway, as I looked through the book, I knew it would be staying here. I'd been wanting to use more whole grains in my baking, and this book fell in my lap at exactly the right time.

After paging through it and filling my head with too many ideas, I had a flour spree at the natural market. Rye flour, white whole wheat flour, and spelt flour... in addition to the all-purpose flour, bread flour, and regular whole wheat flour I already had on hand. I think I may have a problem.

This afternoon, I busted out a quick 100% whole wheat bread--specifically, "The Easiest 100% Whole Wheat Bread Ever". It's a yeast bread, but comes together much more like a quickbread. Everything is mixed together in a bowl, with no kneading. After mixing for a couple of minutes, you put the dough in a loaf pan to proof for an hour (although the recipe does warn that the dough will not actually "rise" at all), and then bake it for about 45 minutes. They're not kidding about the "easy" part.
Results?

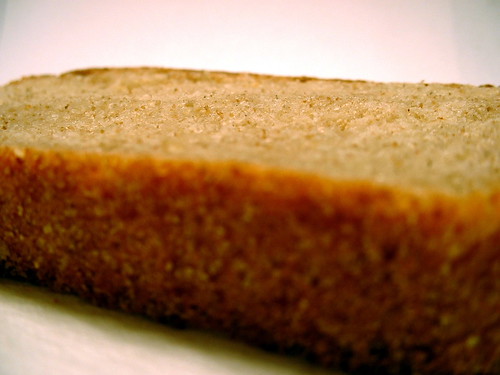
Really nice, sweet flavor, thanks to orange juice and molasses in the dough. Because there wasn't much kneading, the finished bread turned out dense and moist. It fell apart pretty easily--again, no kneading will do that. And check out the color:
100% whole wheat bread

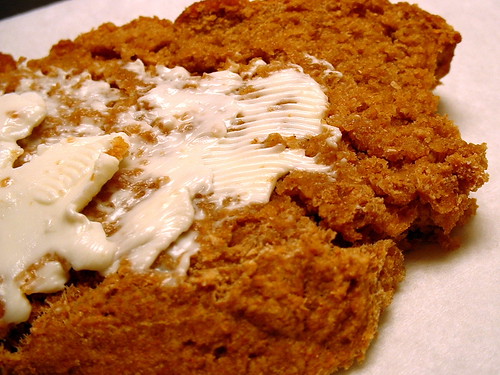
The recipe note suggested a light slathering of cream cheese... who am I to argue? :)

Friday, March 30, 2007

Beer Bread

Got in some baking time last night:
Beer bread

That's a couple of slices of Rose Levy Beranbaum's Beer Bread. I've made a few different beer bread recipes over the years, some with yeast, some without. Overall, I think I like the yeast recipes better. The beer quickbreads that I've made have come out really dense and cakey. That's fine, but with beer bread, I don't want to feel like I'm eating cake. The yeast recipes come out much lighter, although they obviously take longer because of the rising time.
This recipe has both whole wheat flour and white bread flour in it, along with a little bit of either malt powder or sugar to balance out the bitterness from the beer and whole wheat flour. I usually use a stout or a porter for beer bread, but for this one I used some Wolaver's brown ale, which yielded a lighter color bread with a more subtle beer flavor to it. Put some butter and honey on a warm slice of this... that's a couple of minutes of happiness right there. :)

Beer bread

Sunday, March 04, 2007

Pretzel Bread

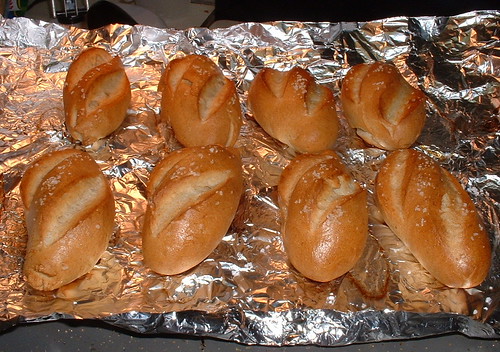
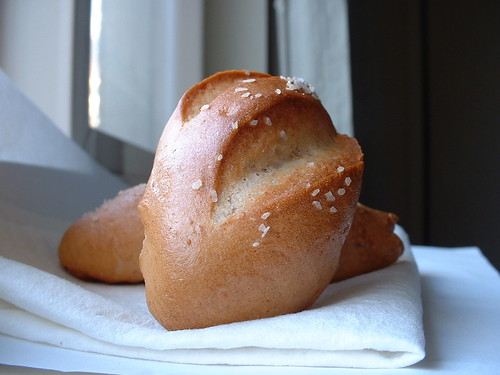
And, if there's "part 1" of homemade snackage, you know there's a part 2... I made a batch of the intriguing-sounding "pretzel bread" rolls from The Bread Bible. They're rolls crossed with soft pretzels: how bad can that be?

First, the with-flash shot of the full batch right out of the oven:
Pretzel Bread


And here's the nicer natural light shot:
Pretzel Bread

I take SEVERE issue with this recipe claiming that you should be able to get 12 rolls out of the amount of dough it makes. I had 8 normal-sized rolls, and they'd have to be really tiny in order to give you a full dozen.

Other than that minor problem, this was a nice recipe. I was raised on Philly soft pretzels, the ones from the street carts that are big and doughy and wonderful, and I miss them. These rolls are definitely NOT soft pretzels, but they have that same dense chewiness that I love.

I didn't do the lye glaze, because lye kind of scares me. You're not supposed to touch it with bare hands because you might get a chemical burn from it... but I'm supposed to put it on rolls that I'm going to eat? Maybe somewhere down the line, but not today. I did the same sugar/baking soda glaze used for the bagels in the book, with good results.

This is a nice, easy, fast recipe -- a yeast bread that takes 2 hours total? Yay!

Tuesday, February 27, 2007

Crackers and breadsticks and chicken, oh my!

Here's what I did with my snowy Sunday...

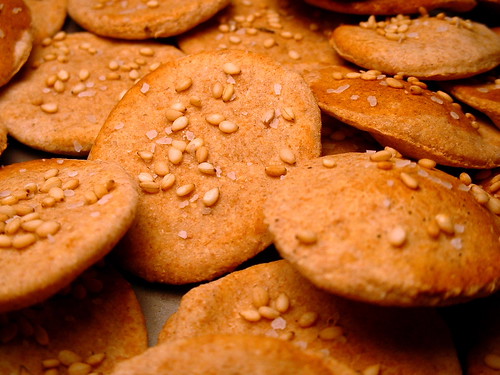
I made whole wheat cumin seed crackers, topped with sesame seeds and kosher salt:
Whole wheat cumin seed crackers


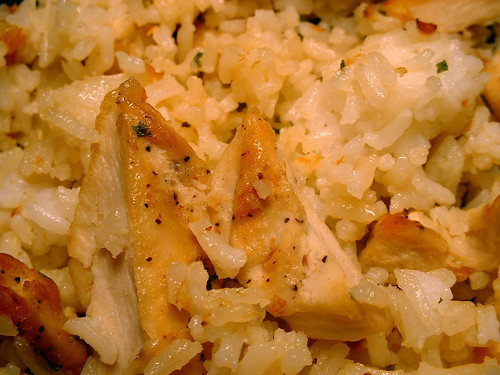
I experimented with an apricot chicken and rice dish:
Apricot glazed chicken and rice


I made a batch of crunchy herbed breadsticks (this batch had oregano and parsley, and romano cheese instead of parmesan):
Homemade crunchy breadsticks

To explain 2/3rds of what I did: I'm not buying any store-bought snack foods during Lent this year, so I'm hauling out various cracker and snack recipes to make in the meantime.

The whole wheat cumin seed crackers are part of a larger Charlie Trotter recipe for a seared tuna something-or-other... I thought the cracker part looked good (fish allergy, blah blah). The cumin seed flavor is actually a bit much in the crackers. I say that as someone who LOVES Indian food and is a fan of cumin seed in general. But, in these crackers, it's kind of overpowering. They're not BAD (half of them are gone already)... just not quite what I was expecting. Happily, I got a chance to test out a substitute "egg" wash that I thought would work nicely for these. Instead of using an egg + water, I mixed equal parts of honey and water, and brushed it on the crackers to adhere the sesame seeds and kosher salt. It worked very well. The honey gives a nice little touch of sweetness that works well with the whole wheat flour in these.

I've made the breadsticks before, and have talked about them here before... they're a nice snacking option, and I figured that I might as well make additional snack stuff while I had the time. :)

The apricot chicken and rice... let's just say that, when it snows around here, other people's driving gets incredibly scary. I decided to stay home and make dinner with what I had on hand. I don't normally make up recipes from scratch; I'll take an existing recipe and change half the ingredients around, but I don't usually just plop down a bunch of ingredients and say, "What can I make with this?" The fact that I came up with something that I actually want to make again... yay! I'll play around with it, and once I get a recipe for it, I'll pass it along.
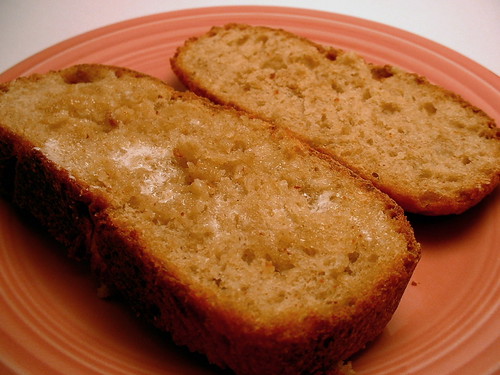
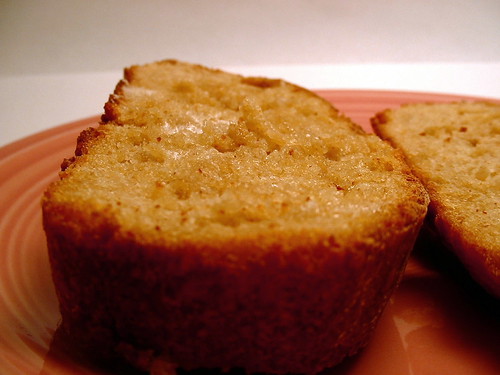
Thursday, February 22, 2007

Bagels

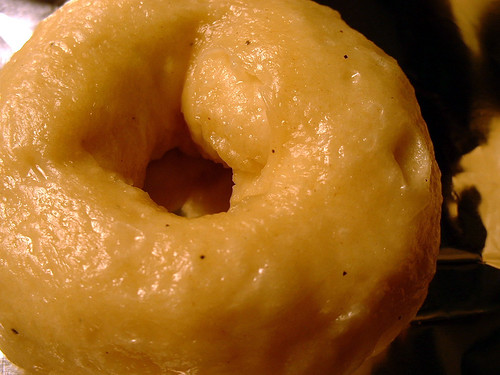
I have wanted to make homemade bagels since I started getting into baking a couple of years ago, and this past Sunday was the day to finally do it.

For a first attempt, they came out nicely. I have several notes for the next time I try this. Knead for longer than I think I have to; make bigger holes; check them halfway through the baking time to see if they're browning too quickly.

This is what I had before baking:
Plain bagel, pre-baking

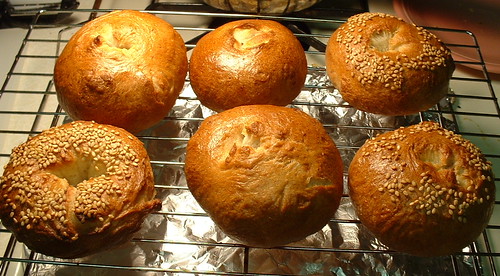
And here's what I had after baking:
Finished bagels

They got a lot browner than I meant for them to be, and the holes on all but one of them closed up from the amount of puffing that took place during baking.

Here's the one that retained its hole:
Homemade bagel

Once I get the recipe down perfectly, the folks at work are definitely getting a batch of these and English muffins some morning...

However, definitely acceptable for a first try.

Sunday, February 18, 2007

Potato, Sage, and Rosemary Pizza

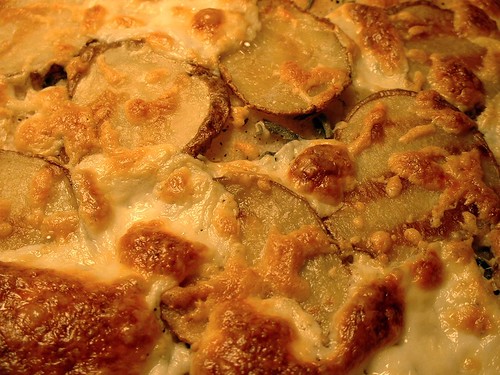
I made this recipe for a party I went to last weekend:

Potato, Rosemary, and Sage pizza

And the more food-porn-y shot:
Potato, Rosemary, and Sage pizza

I grilled the potatoes on my countertop grill, rather than sautéing them. I'm using every excuse possible to use this grill... I love it.

I switched out Romano cheese for the Parmesan cheese that the recipe calls for, mainly because I have a hunk of Romano cheese that I'm trying to use up before anything fuzzy happens to it.
My only complaint was that the rosemary ended up being a bit overpowering and bitter. I would definitely cut back both the rosemary and sage by half if I were to make this again.